
I was rather proud of my little effort last week in producing The World’s Greatest Azure Demo and by all accounts, it’s been exceptionally well received (hey, what did you expect from the world’s greatest demo?!) Anyway, this weekend I went back in and took a look at what the state I’d left my Azure subscription and saw this:
You see the problem? No? How about now:
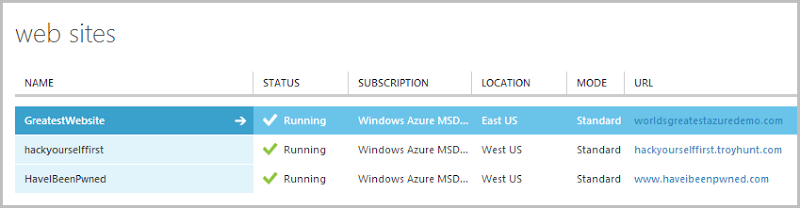
Still no? Check out the “Location” column. You see, the problem is that the website I created as part of this demo is sitting over on the eastern end of the US whilst my other websites are sitting over on the Pacific Ocean end. This, of course, means that they can’t all sit on the one machine therefore I have two machines therefore I’m paying twice as much money as I need to. Bugger.
Now you may wonder “Why not just click the link to automatically move the website to another Azure location”, and that’s a perfectly reasonable question. Unfortunately, despite the amount of magic that Azure gives us, it does not give us a “move my website to another location” button. Bugger again.
But because it’s Azure and because much other magic still abounds, “moving” it is actually easy. I say that in quotes because we won’t actually move it, we’ll create a new one. Here’s how to do it in three simple steps.
1. Create a new site
This is just a straight forward website like we’d normally create. The most important thing is though, it’s in the West US region just like the other ones:
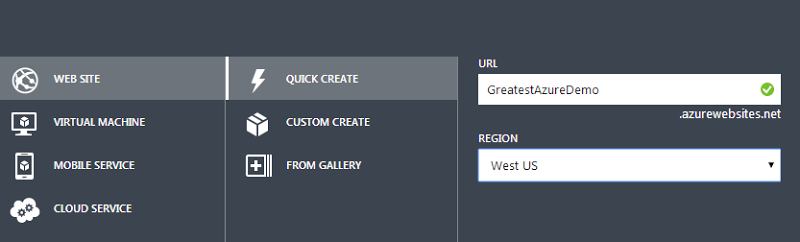
Notice how my original site was called “GreatestWebsite” and now this one is called “GreatestAzureDemo”; you can’t name two Azure websites identically regardless of whether they’re in the same data centre or not. If you’re really attached to the name, you’ve gotta kill the old one first (I mean literally delete the entire site) then create the new one. This means total outage for some period of time.
Now I have the new site listed in the West US:

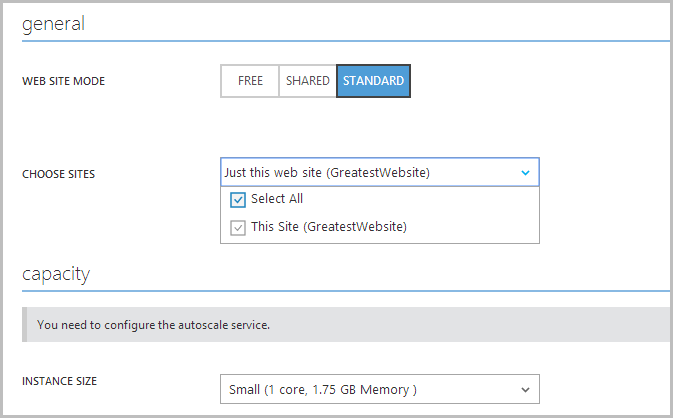
See how it’s defaulted to “Standard” mode? Let’s go take a look at the scale:
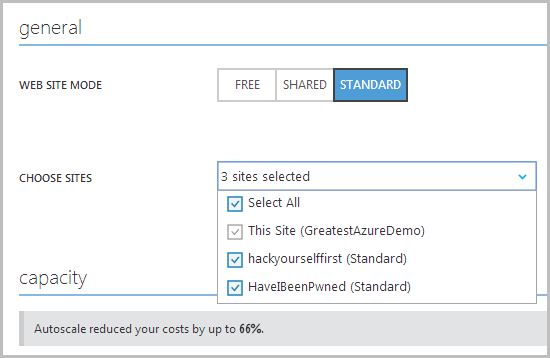
It’s automatically bundled it in within the other two sites in the same data centre which is exactly where I want it. Neat.
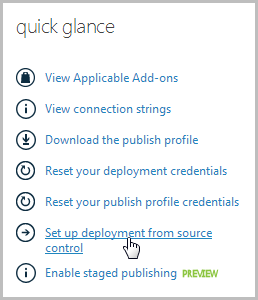
2. Re-deploy the site
Because I originally set the site up to auto-deploy from GitHub, this is dead simple (seriously folks, if you’re not auto-deploying from somewhere, you’re probably doing it wrong). Back to the dashboard for the site and set up deployment from source control:
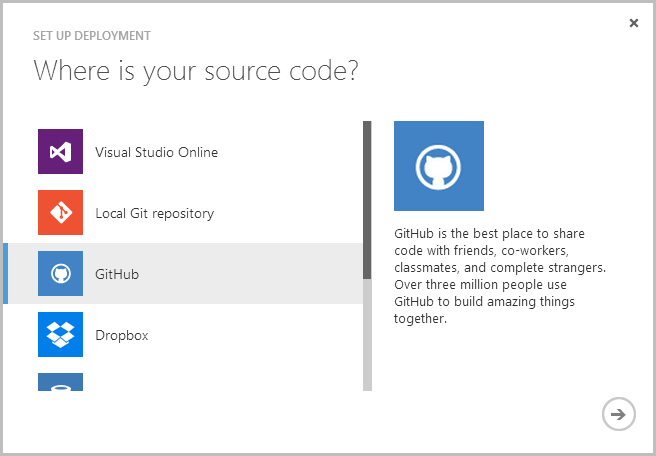
Choose GitHub:
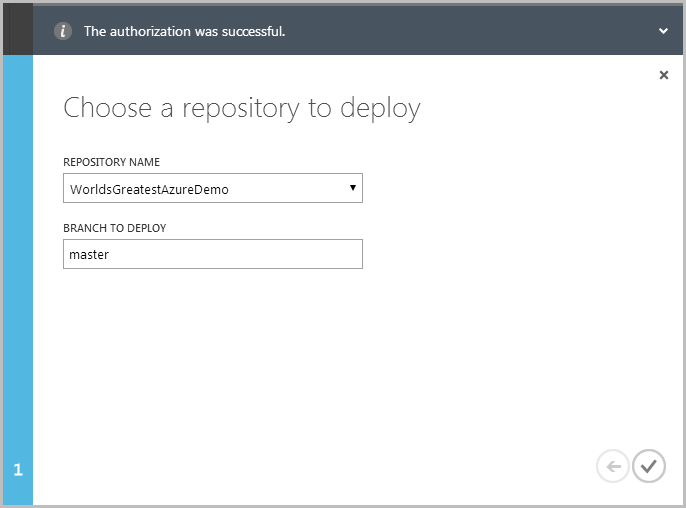
Get yourself authorised when prompted then choose the correct repository:
Wait while magic happens and…
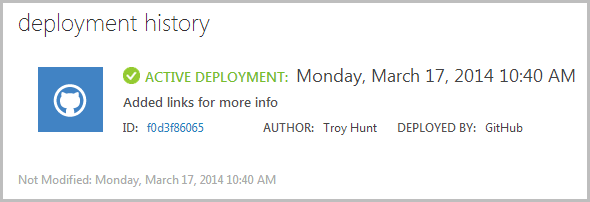
Magic complete! Let’s check it works:
That’s it, the site is done. I don’t have a database or table storage or any other linked resources behind this which makes it dead easy. If I did, I’d need to get those across in a more manual fashion so keep that in mind if you’re dealing with this kind of asset.
That leaves just one thing…
3. Update the DNS
Back into the new website configuration, down to domains and the existing domain gets added:
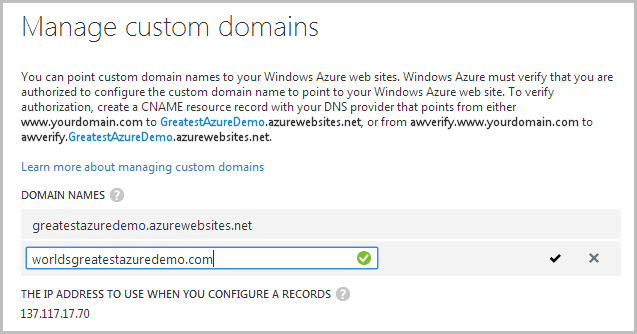
Now I haven’t actually made any DNS changes yet and if I’m honest, I’m a little surprised this is giving me a tick. I expected I’d have to add the CNAME record it’s requesting first but hey, at least this means there’ll be no downtime in the changeover!
Moving on, this is obviously a new CNAME as it contains the name of the new site and it’s a new IP address for the A record too so it’s over to my DNS provider to make the changes. For me that’s GoDaddy (yes, yes, as I said in the video I know many people don’t like them for a variety of reasons but this provider is the one most likely to be familiar to the most people), so here’s what my new settings look like:
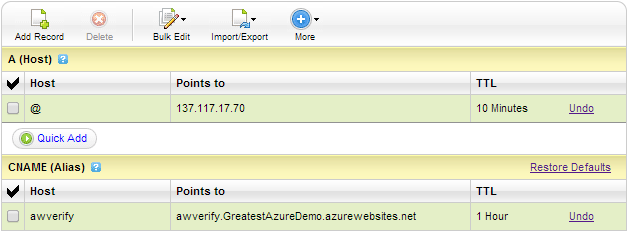
Save the zone file and we’re done! Of course DNS can take a bit to propagate (it has a magic all of its own) so it’s possible that some people might still be hitting the old one for a while. There’s no data collection or anything behind this so it’s fine that people may be hitting either one for a bit.
Oh – while I was in there I also added a CNAME for the “www” prefix as I hadn’t done that in the video. Don’t forget this, many people still like to manually type these things in and they often start with the old dub-dub-dub.
Wrap up
So that’s it, job done in about 5 minutes flat! Once a little time has passed and I’m confident DNS should have reflected its way around the globe (maybe a day) I’ll kill the old site. For now I’ve just set it back to “shared” which will save me a few cents overnight.
In a perfect world, I’d like to see some Azure magic that makes this easier. A big button saying “Move site to alternate region” would be nice. Maybe you still need to muck around with DNS, maybe you still need to do a few things manually like move data, but it seems this is something that could be easier than what it is. Same deal with things like VMs – you screw up that one little location selection when provisioning the resource and things are going to get hard later on. Of course any auto-migration brings with it issues such as data charges on migration and how traffic is routed during the process so by no means do I think this is an easy problem, but I do think it could be easier.