This is one of those “I keep doing this and it hurts each time and there’s never a good concise resource that explains it well so I’m writing one” posts. Yes, yes, I know it’s easy – if you have Ruby installed. Or you’re living in a *nix world. Or you have a reasonable understanding of Git. Or you get pleasure from pain.
However, if you’re living on Windows and you just want to get the damn thing done, it can be painful. I keep setting up new machines and having to remember how to do this from scratch so this time, I’m writing it all down. Here geos:
1) Install Ruby
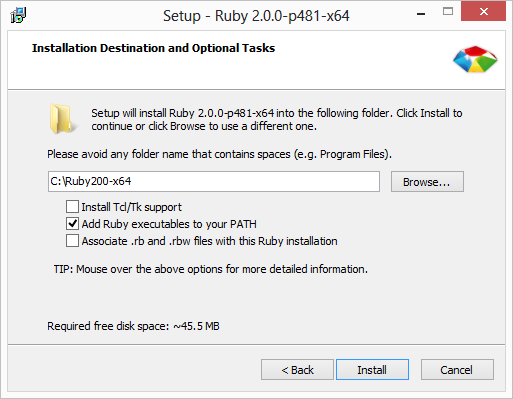
Yep, Ruby. Go get it from the Ruby Installer for Windows page and install the latest version with all the defaults – except this one:
Get the Ruby executable added to your PATH environment variable so that you can run it from anywhere (more on why soon). You’ll probably need a reboot for that PATH declaration to kick in too.
Why Ruby? Because svn2git is written on it so you’re not going far until you have this running.
2) Install the svn2git gem
If gems are a foreign concept, they’re the NuGet packages of the Ruby world. You can grab the svn2git gem directly from the command line, just fire up a command window and run this (the path you run it from won’t matter if you’ve added the PATH declaration per the previous step):
gem install svn2git
Then wait for magic to happen:
That’s svn2git now installed. In case you’re curious, the gem ends up spread out across your Ruby install path:
3) Migrate your Subversion repository
And of course what we all came here for in the first place – pumping that Subversion repository into Git. Refer to the svn2git project page on GitHub for usage or give it a bit of “svn2git –h” whilst in the command window on the path above. Depending on your setup, you may find you need to explicitly provide credentials when you run this command so do consider that. In short though, we’re going to point the tool at a remote Subversion repository and get it to create a local Git repository.
For example’s sake, I’m going to run this in a new local folder I created at c:\MyProject:
svn2git http://[domain name]/svn/[repository root]
After it all runs, you’ll have a complete Git repository with all the code and the revision history in the c:\MyProject path. Go ahead and use your favourite Git client and check the commit history – look familiar? It should.
One gotcha here and for the sake of Googleability, let me repeat the error you may see:
command failed:
git checkout –f master
This is what happens when you point svn2git at a path beneath the repository root such as “trunk”. It’s easy to do as it’s probably the trunk you have checked out locally and if you do what I do and get around copying and pasting links, it’s very easy to do this and wonder what’s going on. Check your path!
4) Push your repository to somewhere useful (like GitHub)
Just to close the loop on the workflow that many people will go through, you’ll often end up wanting to take your shiny new repository and whack it up to somewhere like GitHub. I’ve got an empty demo repository that looks just like this:
I’m going to take the URL of the repository (it’s down there towards the bottom right in the image above) and add it as a remote:
git remote add origin https://github.com/troyhunt/MyProject.git
Just as a sanity check, I’ll give it a bit of “git remote –v” to confirm it’s completed successfully:
Now let’s push all the local braches up to GitHub
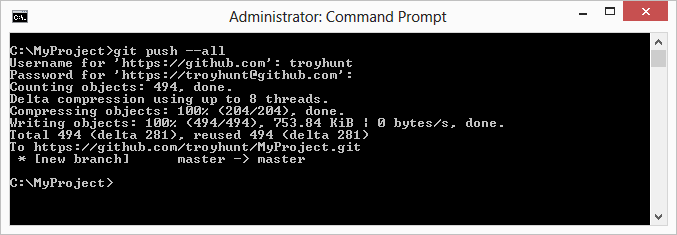
git push –-all
Which gives us:
And we’re done! Let’s sanity check that on GitHub:
32 commits – there’s your history!
Wrap up
This is a deliberately simplistic view which intentionally doesn’t touch on a number of various issues, but it’s all about getting up and running as easily possible.


