| << Part 1: Config transforms | Part 3: Publishing with Web Deploy >> |
In the first part of the series we looked at config transforms and how we’ve moved on from the bad old days of manual Web.config configuration at release time. Now let’s take a look at how we can incorporate this into a nice clean deployable package with the rest of the application.
Many people, me included at one stage, have only ever been familiar with the concept of .NET compilation as a result of building within Visual Studio. Keep in mind though that Visual Studio is no more than an IDE. Ok, it’s a particularly good IDE but it doesn’t have a monopoly and compilation and actually creating object code from C# (or that other one).
Once we start moving towards compiling on a build server, there’s no concept of Visual Studio (it won’t be installed on the machine) and we need to be able to run builds from the command line. This is why we now need to start getting a bit intimate with MSBuild.
Welcome to MSBuild
MSBuild is actually a rather comprehensive platform of which I only want to touch on what’s absolutely necessary to achieve the objective of this blog series. There are two very important tasks we need MSBuild to perform within the build server:
- Ensure the entire solution builds. Not just the web app or it’s dependencies but the entire solution which could include other interface layers, unit test projects, etc.
- Package the web app. We need to go through a packaging process before deployment can happen and MSBuild is going to do this for us.
Let’s start with the MSBuild basics. If we navigate over to the “Microsoft Visual Studio 2010” folder in your start menu then drill down into “Visual Studio Tools” we’ll have a program titled “Visual Studio Command Prompt” with an icon that looks just like the good old command window next to it. This loads up a (hopefully) familiar environment with the current directory drilled down into the Visual Studio folder. From here we can start running MSBuild commands. We could also run them from the MSBuild packaged in with the .NET framework at “C:\Windows\Microsoft.NET\Framework\v4.0.30319\msbuild.exe” but we’ll stick with the VS command window for the moment.
The easiest way of running a build against the existing project is simply to navigate over to the root folder of the project (which should contain the .sln file) and run the command “msbuild”. This will automatically identify that a solution file exists in the folder and run the build. Here’s what happens:
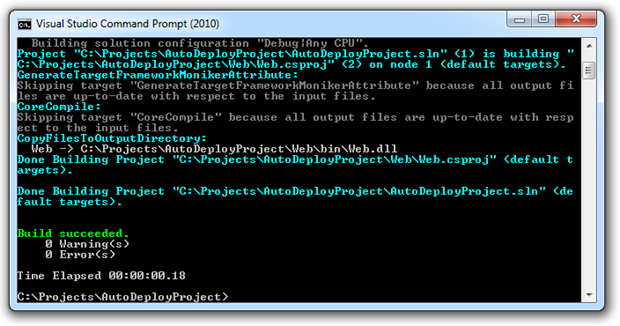
Getting a bit more explicit and running the msbuild command with the solution file as a parameter will yield an identical result:
msbuild AutoDeployProject.sln
There’s quite a bit of info in the window above, at least quite a bit more than you usually get in Visual Studio with the default level of build output verbosity. So what does a failed build look like? Here’s what happens when I introduce an error to the project and try and reference “NonExistentClass”:
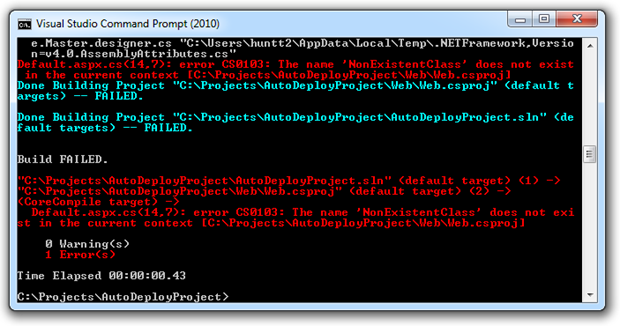
I’m showing this simply because the output becomes an important concept once we get into automated builds. This is essential information for working through the root cause of failed builds and we’re going to be seeing this again in the near future.
What’s a “package”?
Web packaging is a pretty essential component of this blog series. It’s how we’re going encapsulate our entire website into a redistributable format which can then be pushed out over Web Deploy. Introduced by Microsoft last year and bundled in with Web Deploy and Visual Studio 2010, Vishal Joshi has a great simple explanation for it:
Web Packaging is the process of creating a .zip file which can contain your web content (pages, images, CSS, JavaScript files etc), databases, IIS Settings, Application creation, ACLs etc.
The really important thing to note here is that not only does a package contain all the usual web content you’d expect (aspx, css, js, etc.), it may also contain a database (which again, we won’t look at in this series) as well as IIS settings and ACLs. In short, the package becomes an authoritative source of both the structure and configuration of a web application.
There are numerous ways of creating a web package including by backing up a website directly from IIS, publishing one directly out of Visual Studio or scripting it from the command prompt from the solution files. It’s this last strategy we’re going to look at next because it’s easily automated.
Creating packages with MSBuild
So now that the solution builds, let’s look at packaging the web app. We’re going to run MSBuild again but this time against the project file in the web app and with a couple of new parameters. Here’s how it looks:
msbuild Web.csproj /T:Package /P:Configuration=Deploy-Dev
After the csproj parameter, the next one declares an MSBuild target which in this case is “Package”. Next up is pretty self-explanatory and is obviously running the “Deploy-Dev” build configuration we created in part 1 of this series. This is important because it’s the config transforms in this build that we want incorporated into the package. Here’s what we get once the build finishes:
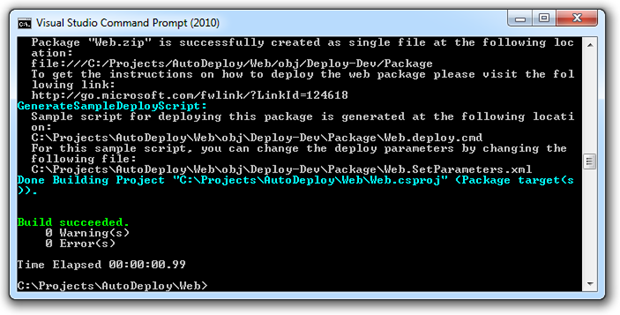
In the first line of the output window we can see a zip file has been created and saved into the “obj/Deploy-Dev/Package” folder. If we take a look in Windows Explorer we’ll see the output of the packaging process:
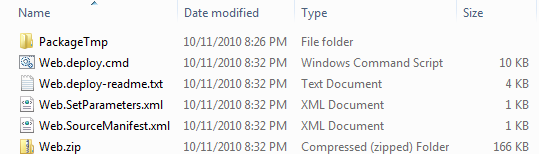
The final thing we want to do is confirm the config transforms have been successfully recognised. I say “recognised” rather than “applied” because creating the package is only the first half of the config transforms process. There’s a couple of interesting things to observe here. Firstly, within the Web.SetParameters.xml file we’ll find a parameters node with a couple of child nodes titled “setParameter”. One of these will look like this:
<setParameter name="AutoDeployDb-Web.config Connection String"
  value="Data Source=MyDevServer;Initial Catalog=AutoDeploy;User
  ID=AutoDeployUser;Password=s*#@Kdsl" />
What we’re seeing here is the “AutoDeployDb” connection string with a value attribute matching the config transform for the “Deploy-Dev” build. Now let’s take a look inside the PackageTmp folder and we’ll find what looks like a deployed web application and it almost is. Let’s take a look inside the Web.config and in particular, at the “AutoDeployDb” connection string:
<add name="AutoDeployDb" connectionString="$(ReplacableToken_AutoDeployDb-
  Web.config Connection String_0)"/>
Obviously the config transform hasn’t been applied yet. The reason behind this is explained more fully in the MSDN post about How to: Use Parameters to Configure Deployment Settings When a Package is Installed but in short, you may not always know the correct value for the target destination. For example, you may not have the credentials for the connection string and instead be dependent on an administrator to fill these in after packaging but before deployment. In the scenario I’m building in this post, we do know the values of each of our configurations for each of our environments but I thought it was worth explaining why the package was structured in this fashion.
I don’t want to get too tangential here, but there’s one other thing worth touching on briefly in relation to the Web.config in the package. Just below the connection string with the tokenised value we’ll find the app setting for the chart handler, but it’s presented a little differently to the connection string:
<add key="ChartImageHandler"
  value="storage=file;timeout=20;dir=d:\inetpub\AutoDeploy\TempImageFiles\"/>
Whoa, what’s going on here? Where’s the tokenisation? I struggled to find information on this so I turned to the oracle of programming knowledge that is Stack Overflow and asked Why are some Web.config transforms tokenised into SetParameters.xml and others are not? As it turns out, connection strings are, well, a little bit special. By default (and this can be overridden), only connection strings are tokenised with their values stored in the SetParameters.xml file then substituted on deploy while all other Web.config values with an appropriate transform are substituted when the package is created.
Frankly, I find this a little counter-intuitive to the earlier message about not knowing target environment values at the time of packaging. Surely there are valid use cases for this outside of just connection strings? Service accounts, for example, may be required for the application to connect to other systems but the credentials are not intended to be shared with the developer. Anyway, that’s how it works as of today and given the scenario we’re modelling in this post it’s not going to affect us anyway.
Coming next…
So our config settings are working beautifully and we have a nice deployable package. Now we need to actually do something with it which is where MSDeploy will come into play in part 3.
| << Part 1: Config transforms | Part 3: Publishing with Web Deploy >> |