Let us start with what's wrong with the world today, and that's certificate authorities. Just take a look at the trusted root CAs running on a Windows 10 machine:
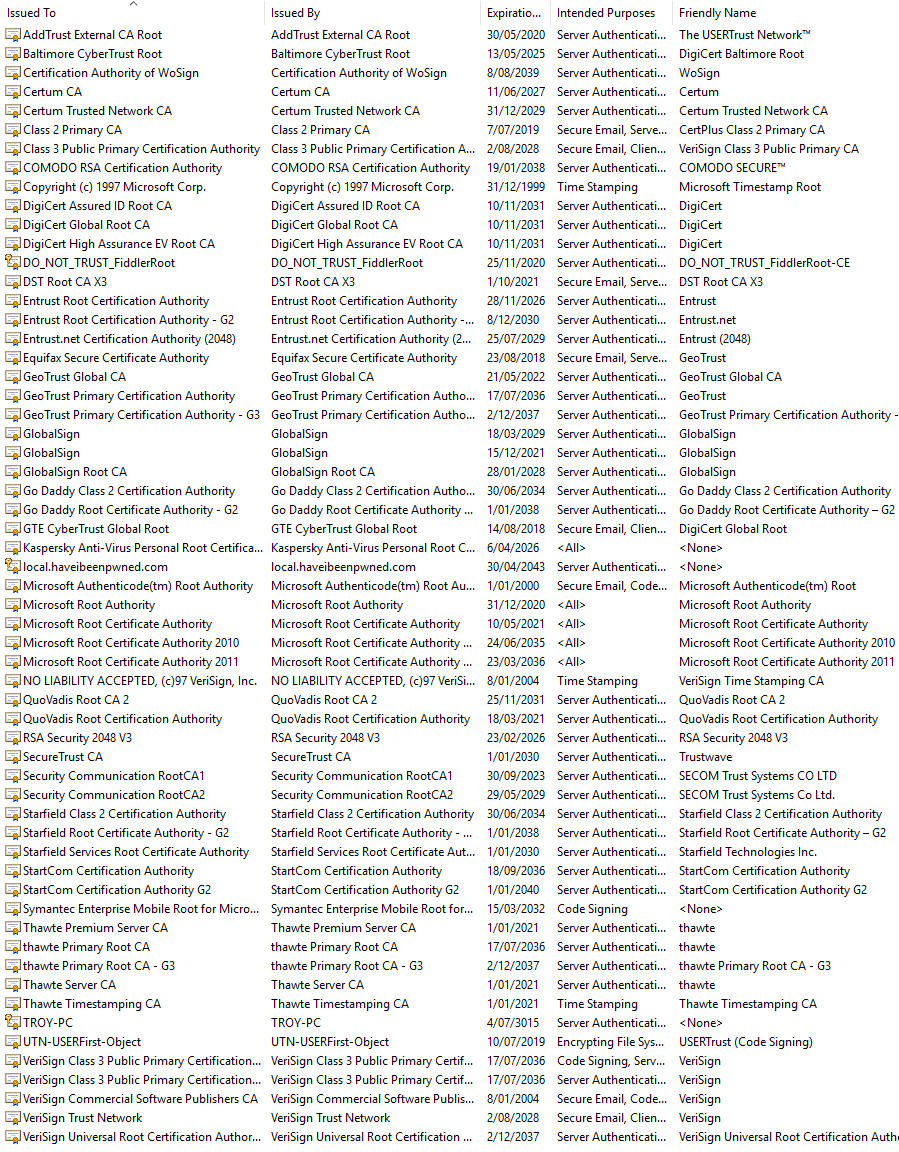
The very premise of having these root CAs on your machine is that they ultimate get to decide which websites your browser will consider to have a valid SSL certificate. The root CAs serve other purposes too, but that's what I'm especially interested in here.
Edit: As Tom points out below, there are hundreds of other root certs the OS will happily trust as required. Microsoft documents this on the Microsoft Trusted Root Certificate Program page.
Now here's the point I'm driving at - if QuoVadis wants to sign a certificate that's loaded onto a website which then serves traffic over HTTPS, your browser will validate the certificate and be entirely happy with it. I have no idea who these guys are. Ok, I do now by courtesy of Wikipedia (they're HQ'd in Bermuda), but the point is that they have a great deal of control over the trust my machine establishes in other websites and they're one of dozens in the local root store.
A more established name in the business is Comodo. In fact, they're very established to the point where they issue more than 40% of all certificates on the web which is nearly double second place (Symantec with 23%) and four times third place (GoDaddy with 10%). Certificates are big business too and Comodo sells a lot of these:
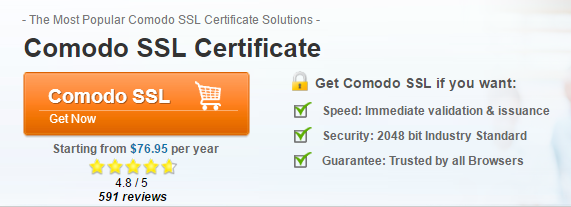
That's within the realms of standard market pricing too. StartCom are $60 a year, GoDaddy is $70 and others charge varying amounts for various classes of cert. It's a lucrative business and one the incumbent CAs want to protect. In fact, they want to protect it so much, that Comodo even tried to trademark variations of Let's Encrypt's name, such is the threat of the new up-start we're going to talk about here. As if that wasn't audacious enough, Comodo's CEO defended his company's position in attempting to trademark Let's Encrypt by saying "How can you prove it was them who made it up?". They ultimately realised they'd totally misread the market and the whole thing was what could only be referred to as "a dick move" and they retracted their claim to the name.
But let's get onto Let's Encrypt and talk about why it's upsetting the industry so much. There are several problems with the way the entire CA model has handled certificates in times gone by:
- The price poses a barrier to entry. Even at only tens of dollars a year, people have shied away from buying them.
- The setup can be clunky. Read through my post on The complete guide to loading a free SSL certificate into an Azure website if you've either not experienced the joy yourself or think that it's an easy thing.
- They need to be renewed. This compounds both the points above as you have to keep doing it and keep paying for it. People also forget too - there are many tales of woe where certificates have expired and things have broken because someone forgot to renew it.
Let's Encrypt sets out to address these issues and the banner on their site makes it pretty clear how:
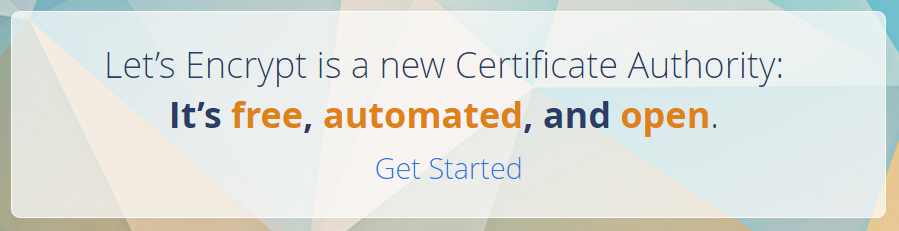
I'm going to steal directly from their about page to highlight how they're doing this:
- Free: Anyone who owns a domain name can use Let’s Encrypt to obtain a trusted certificate at zero cost.
- Automatic: Software running on a web server can interact with Let’s Encrypt to painlessly obtain a certificate, securely configure it for use, and automatically take care of renewal.
- Secure: Let’s Encrypt will serve as a platform for advancing TLS security best practices, both on the CA side and by helping site operators properly secure their servers.
- Transparent: All certificates issued or revoked will be publicly recorded and available for anyone to inspect.
- Open: The automatic issuance and renewal protocol will be published as an open standard that others can adopt.
- Cooperative: Much like the underlying Internet protocols themselves, Let’s Encrypt is a joint effort to benefit the community, beyond the control of any one organization.
In a nutshell, it's an automatic way of both installing and renewing certificates and it doesn't cost you a cent. It's no less secure than the likes of Comodo (don't let claims to the contrary fool you) and since it kicked off late last year they've now issued over 5 million certificates so the service has been well and truly tested. The certificates are only valid for three months, but when renewal is automatic that doesn't really matter, it just ticks over to a new one at the appropriate time.
Edit (18 Feb 2017): Someone from Let's Encrypt just pinged me with an update - they've now issued over 28 million certificates! That's an amazing stat in itself, let alone the almost 6-fold growth in just the 7 months since I wrote this!
In this blog post I'm going to ultimately use the Azure Let's Encrypt Site Extension. There's some great documentation provided with this extension and what I'm going to do here largely adheres to that so full credit to them for making this easy for me. I'll add a number of things along the way that I think are relevant, particularly to understanding SSL and the role Let's Encrypt plays. Further to that, when I sat down to write this I'd never actually deployed a Let's Encrypt cert before; I write these blog posts as much to get my own thoughts straight when I'm learning something new as I do to help others! Regardless, it should be really useful info for those who come after me.
Enough background, let's make the thing work.
Prerequisites
I'm going to be running this process on an Azure website so firstly, you need one of them. This is the PaaS website offering I'm so fond of and it's exactly what I run Have I been pwned (HIBP) on. However, for this exercise, I'm going to be loading a new certificate into Hack Yourself First, the intentionally vulnerable website I use in so many of my Pluralsight courses and in my workshops. The cert from StartCom was coming up for renewal so I decided that now was a good time to use Let's Encrypt "in anger".
You also need to have an Azure Storage account. We'll need this towards the end of the setup process when we eventually have a WebJob running and it requires the storage account in order to store logs. You may already have one of these for your website but if you don't, go set one up first. The pricing for the tiny amount of storage we're going to use is as good as zero (literally in the order of cents per month), so don't worry about that.
Right, so that's everything you need before doing anything, let's get on with actually making Let's Encrypt work in an Azure website.
Creating an Azure Service Principal
Remember that bit about how Let's Encrypt is "automated"? Making all this work means we're going to need to enable a process to run within Azure under an identity and to do that we need an Active Directory service principal. In simple terms, this is just a user in your existing AD implementation (everyone with an Azure account already has one) that will be given the required rights to set the Let's Encrypt cert up.
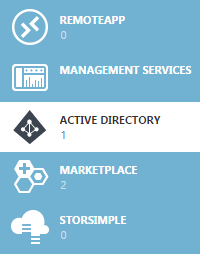
To do this, as of the time of writing we still need to jump over to the old portal (or "classic portal", as Microsoft refers to it). You can PowerShell it if you prefer, but we'll use the GUI here. We'll start here on the left hand navigation:
Edit: This can now be done in the new portal
Here's what I presently see within my AD:

Drilling down into that single entry, I'll now go to my existing applications:
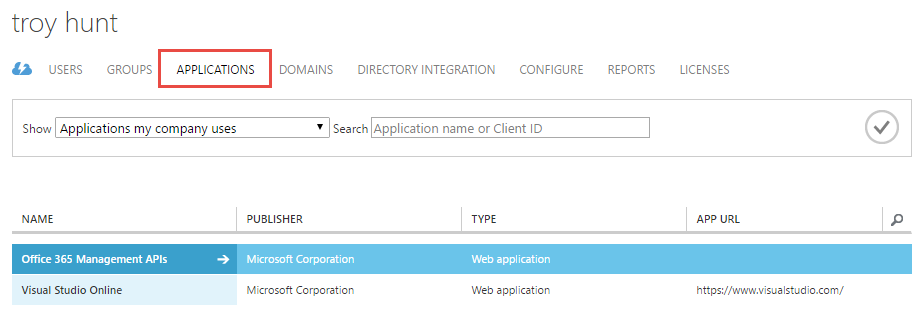
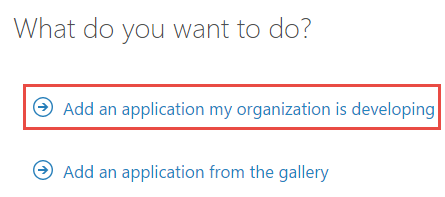
What we're going to do now is add a new application for Let's Encrypt via the add button in the footer of the page:

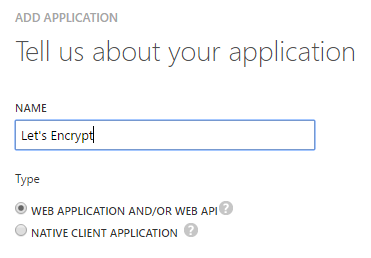
This will be an app that "my organisation is developing":
And then we'll give it a sensible name:
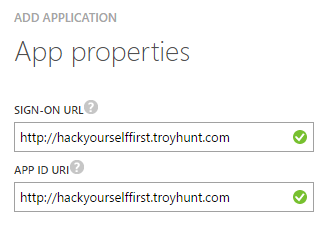
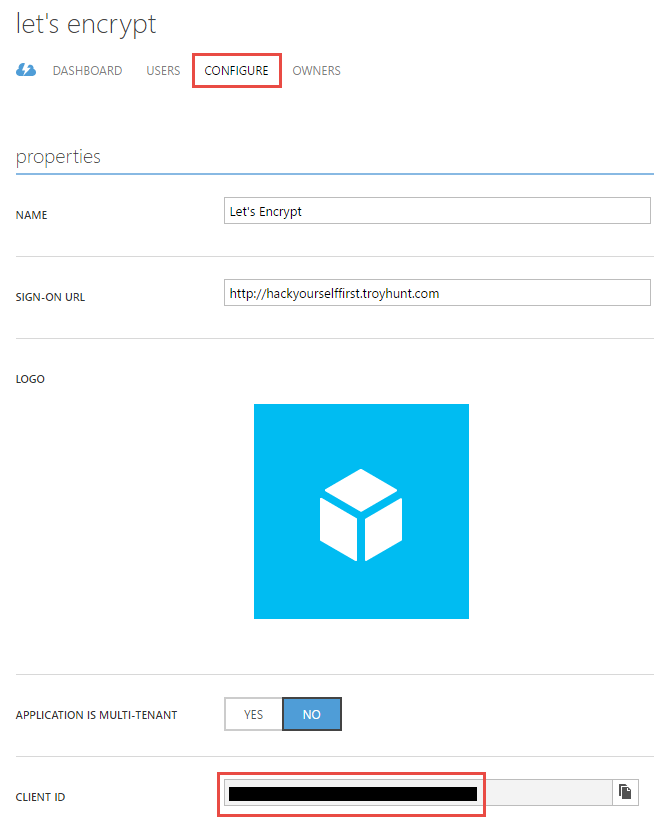
Lastly, we need to define a couple of URLs that would normally relate to how you sign into the AD app we're creating. But we're never going to actually need these addresses so you can go ahead and put any valid URL you like in there, here's what I did:
Eventually, we're going to need to allow the site extension that does the Let's Encrypt magic to sign in using this service principal and to do that we need two things. The first is the client ID of the app we just created and that's down under the "configure" option in the nav:
The second is that we need a key that can be used to authenticate the client principal so scroll down a little but further and add one of those:

Per the description in the image above, once you hit the save button you'll actually have a value you can copy. Take a note of that and then we're done with the service principal setup.
Granting the service principal access to the resource group
A quick "Azure hierarchy 101":
You have an Azure account.
The account may have many subscriptions.
A subscription may have many resource groups.
A resource group may have many resources.
Get this straight in your head and you're all good. Mix it up and, well, it all gets very confusing. Actually, just on that, do try and keep the naming of your resource groups fairly logical as it's real easy for them to get out of control (ask me how I know...) and that makes things rather confusing. Remember, a resource group should contain logically associated resources (for example, a project with a website, database, storage etc.) and you can then assign role based access controls to that group.
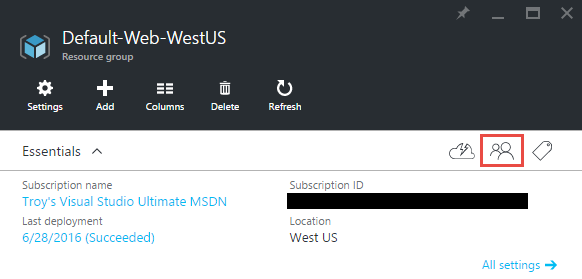
Moving on, we want to grab the resource group that has the app service plan which is the logical machine(s) the site is running on, plus you'll find the site itself should be in there as well. Because I'm not always real good at taking my own advice, my resource group is still named "Default-Web-WestUS" and we're going to drill down into the access controls of the resource group by clicking on the two little heads:
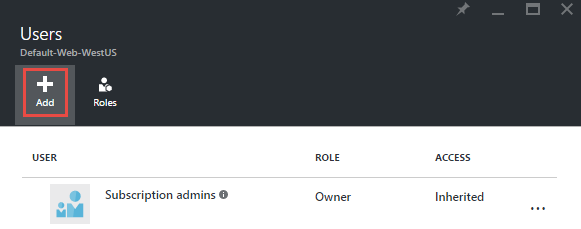
This is where we now bring in the service principal and we're going to do that by adding a user:
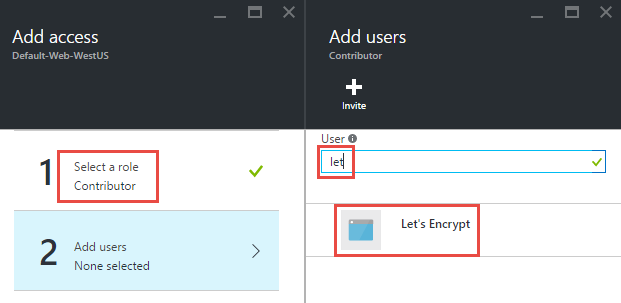
Now drill down into the roles and select "Contributor" then add a user and start typing the name of the service principal. This is important as it won't be listed there on its own. Here's what you should now see:
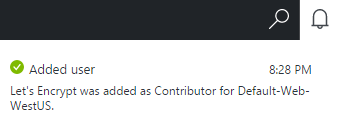
Select, ok, wait a bit and you'll shortly see a success message:
So now we have a service principal which has the correct rights in the resource group containing the website we want to create the cert for. There's just one more thing we need to get right before we can setup Let's Encrypt itself.
Configuring the storage account
I mentioned earlier on in the prerequisites section that we'd need a storage account. It's a little bit more than that though as we also need to configure the website so that WebJobs running on it can communicate with the storage account. If you've used WebJobs before then this will be pretty familiar stuff, but let's run through it anyway.
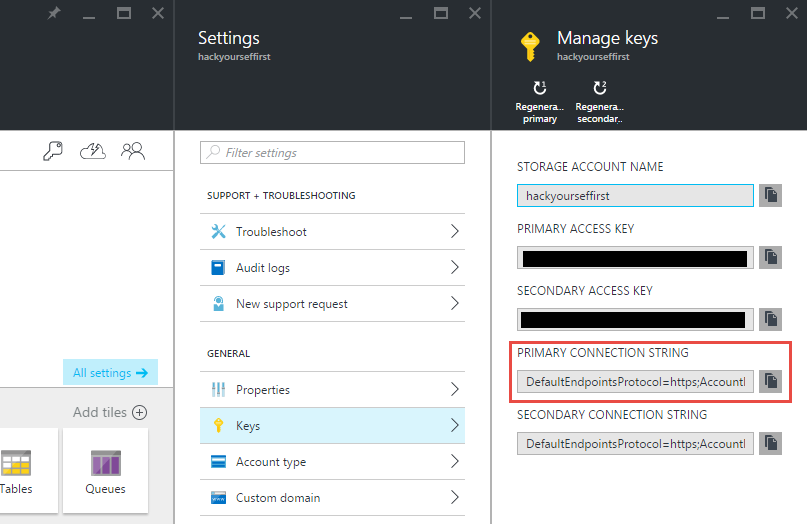
Jump over to your storage account and copy the primary connection string:
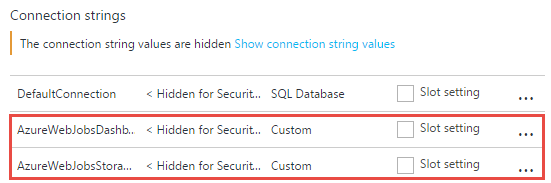
Now head over to the website that we'll ultimately be installing the new certificate on and create two connection strings, one called "AzureWebJobsDashboard" and another called "AzureWebJobsStorage", both with the value copied from the storage account above and both configured as "Custom" connection strings:
That's all the native Azure bits done, it's time to make Let's Encrypt work.
Configuring the site extension
This is really the guts of making Let's Encrypt work; everything until now was just setup. We're going to start by jumping into Kudu:
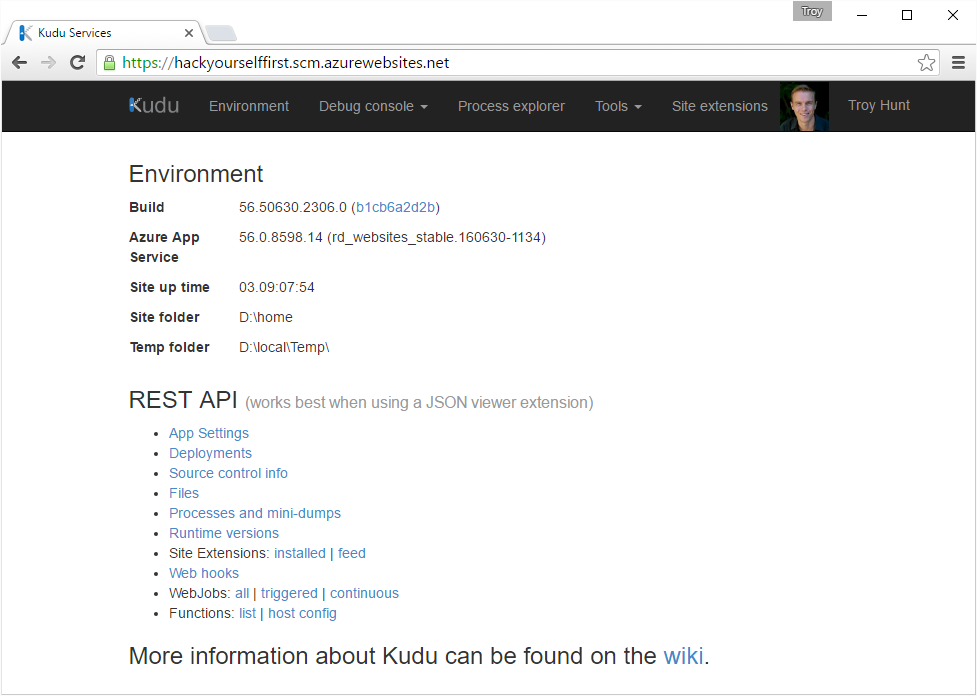
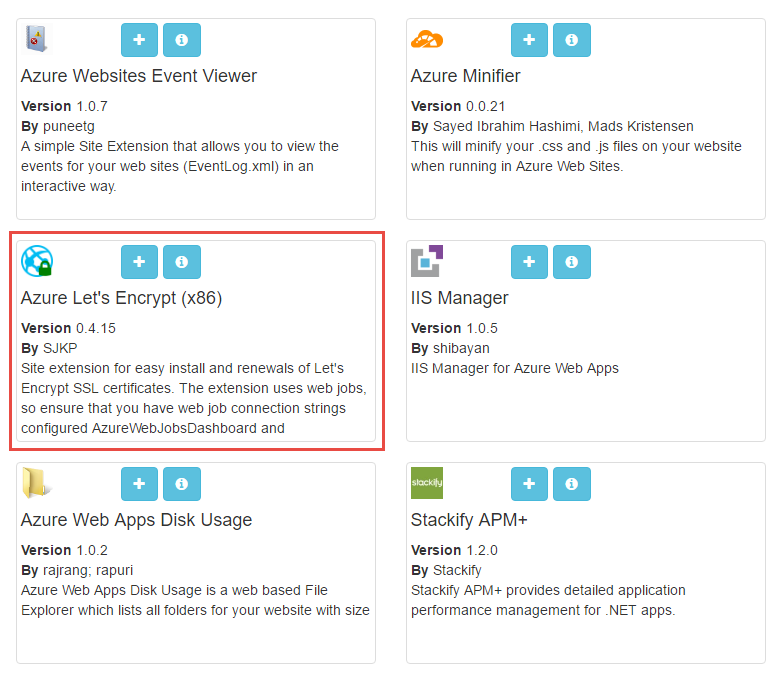
If you're using Azure websites and not already using Kudu, you're missing out as there's a heap of good stuff in there. I won't go into it all now, suffice to say that if you head over to https://{your website name}.scm.azurewebsites.net you get a bunch of awesome stuff. One of those awesome things is site extensions and within there you'll find one called "Azure Let's Encrypt (x86)":
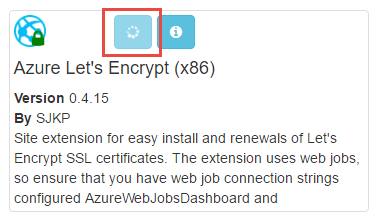
Hit the "+" button on that (make sure you chose the x86 version unless you've moved away from the default website configuration and are running 64 bit) and then tell it to install. You'll get an indicator showing that stuff is happening:
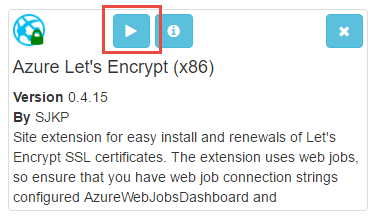
And when it's done, you'll get a play button:
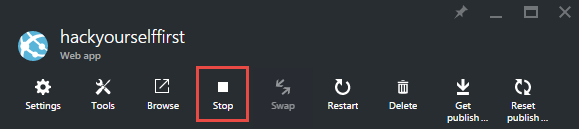
Now this is important - if you hit play button you'll likely see a rather unfriendly error about "No route registered for '/letsencrypt/'". Jump back into the Azure portal, find the website and stop it:
Now start it again. Don't restart it, it needs a completely cold stop / start cycle and yes, this will obviously take the site offline for a few seconds too. Once that's done, head back to the site extension and hit that play button again after which the new extension should be running just fine:
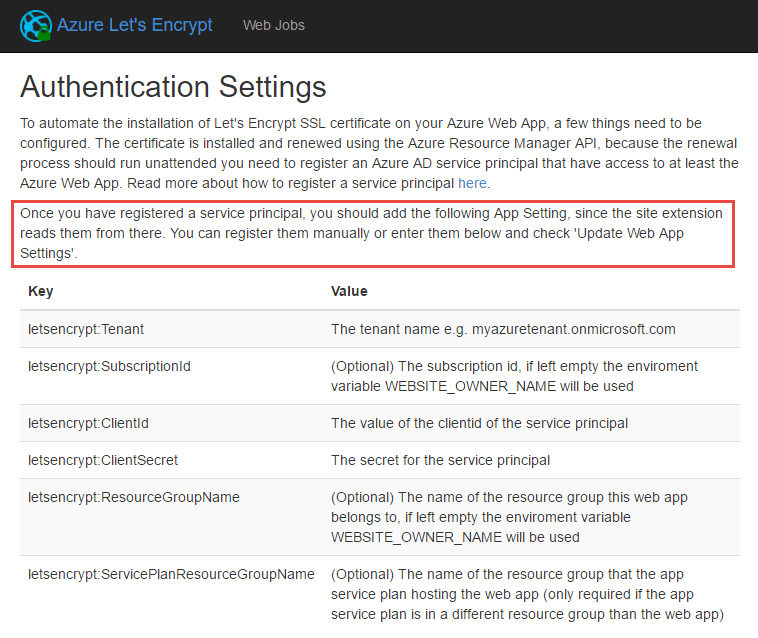
There's a bit going on here so I've highlighted the most important bit - the key values pairs on the bottom part of the screen are the app settings you need to configure on the website. Further down the page you'll see a bunch of empty text fields:
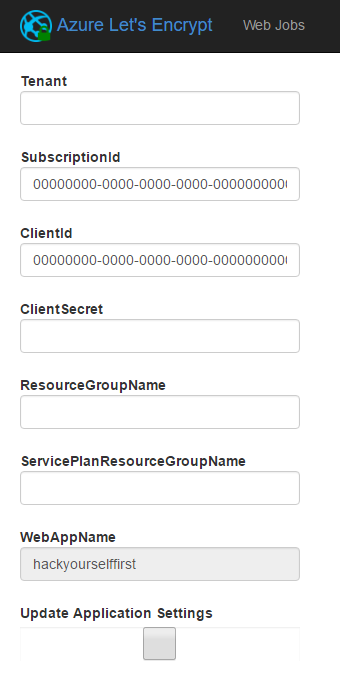
We'll come back to these later, for now let's just agree that there's nothing in them. Now it all gets a bit painful because we need to retrieve a bunch of information from a variety of different sources then create app settings in the website after which the empty text boxes you see above will populate with the correct values.
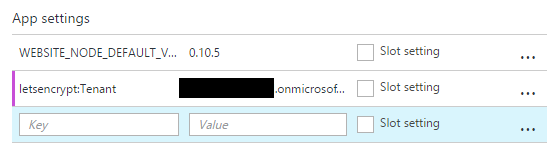
We'll start with the tenant name which you'll find under your identity in the top right of the portal (not in Kudu):
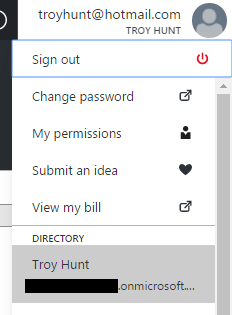
You'll find it'll be something like {my name}.onmicrosoft.com so grab that and create an app setting which should now look something like this:
Next up is the subscription ID and you can grab that from a bunch of places, easiest is probably from the website "Essentials" panel:
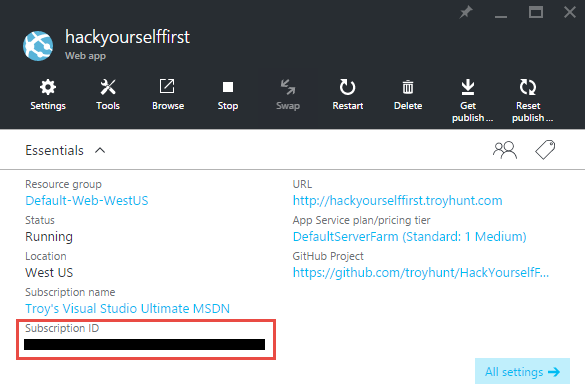
Grab that guy and drop it into another app setting (I won't screen cap them all individually).
The next two are easy - the client ID and the client secret - and they're the ones we have from when the service principal was created. They now go into the next two app settings.
Nearly there, next one is the resource group name and we've seen that multiple places now, including in the image above with the subscription ID. That's all we need, we can skip the service plan resource group name entry. When it's all done, it should look something like this:
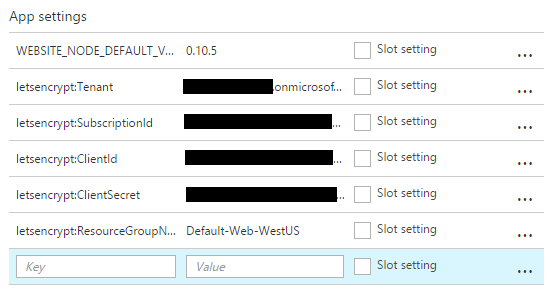
Right, save all that, jump back to the Let's Encrypt site extension in Kudu and give the page a refresh. Those text fields which were empty before should now look like this:

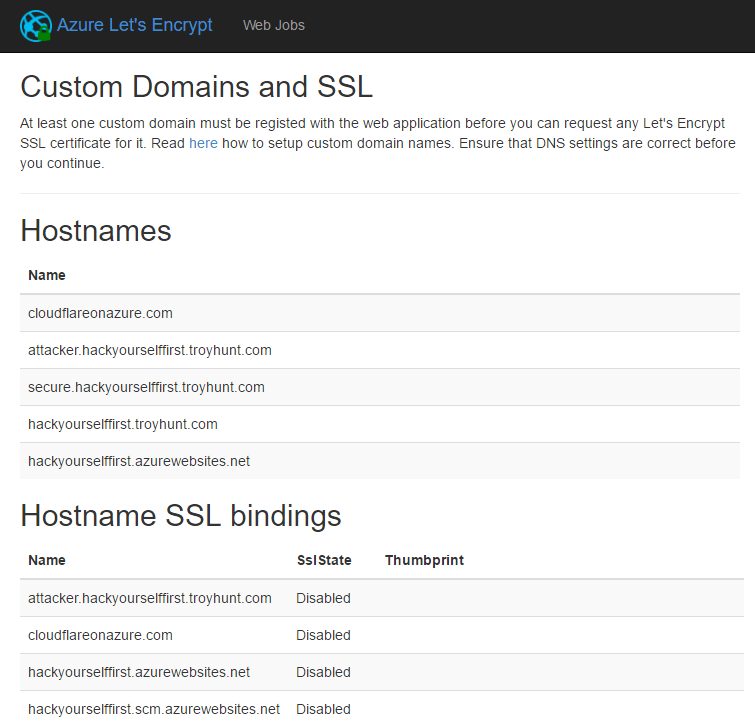
Now we're getting to the pointy end of all this. Hit "Next" and you'll see a summary of the existing hostnames and SSL bindings on the site:
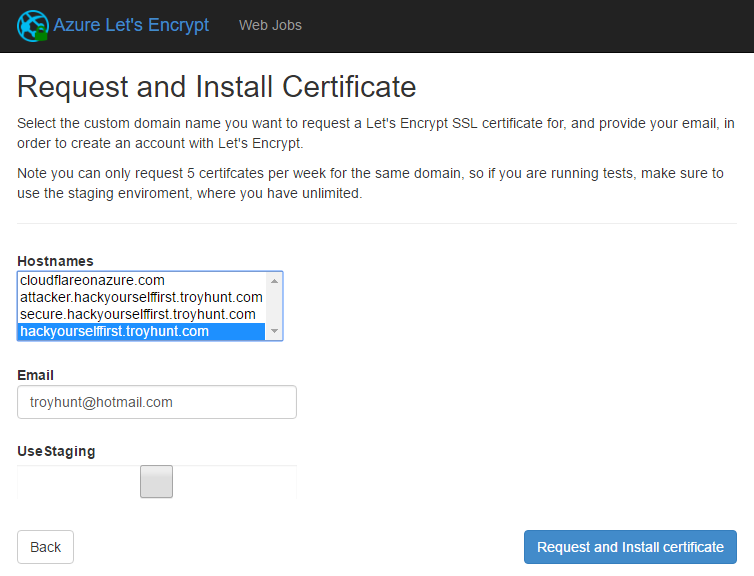
Hit "Next" again and now we're finally at the stage of actually requesting the certificate. Chose the hostname you actually want, enter your email then request and install certificate:
And then you wait... for what feels like ages until:
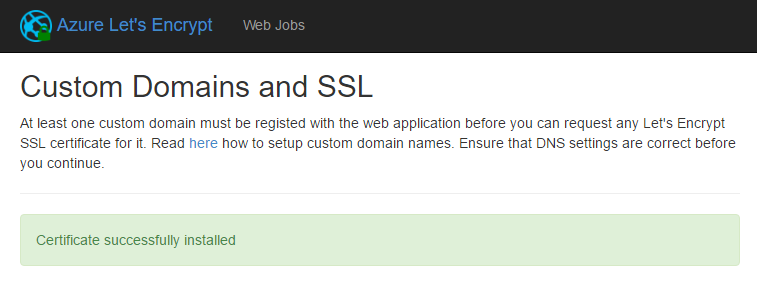
Hang on - is it really that easy?! Ok, there was a lot of earlier work but was installing the certificate itself as simple as hitting one button? Let's check out the portal:
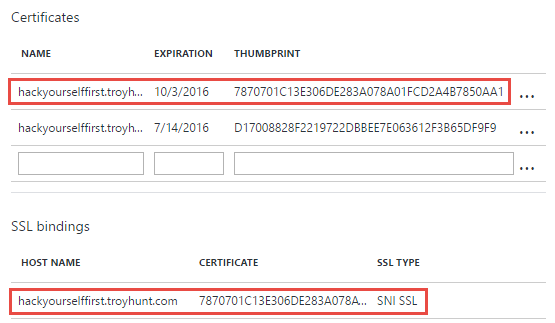
There's two certs here, the one I haven't highlighted expires on the 14th of July and that's the StartCom one I mentioned earlier on in the blog. The highlighted one is the new one from Let's Encrypt which will expire in only a few months from now (remember, they're all 90 day certs). We can then see the thumbprint of that cert appear on the SSL bindings further down. All this means that if we now go to the website and check the cert:
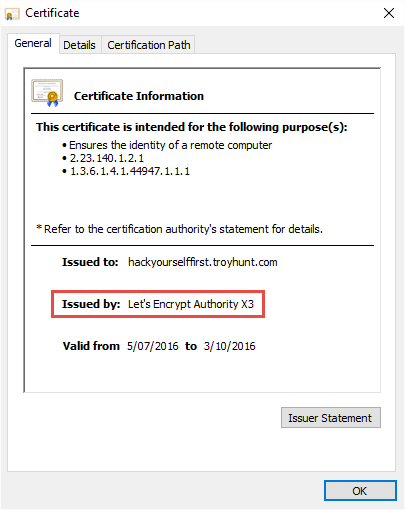
Success! It took some effort, but the whole thing is now up and running just the way I'd expect it to be. Don't just do this and say "ooh, magic certificate!" rather do have a read of Let's Encrypt's How it Works page. It's a very short read and it's important to understand how the website communicates with their service in order to identify itself and ultimately receive a certificate.
But getting back to that certificate, it'll expire in a few months and Let's Encrypt is meant to automate the renewal process, so how does this work? Let's take a look.
Automatic renewal with WebJobs
I've long espoused the virtues of Azure WebJobs because they're easy to implement, highly resilient and free to run on an existing website service (amongst other virtues). WebJobs are also the mechanics behind how the Let's Encrypt site extension renews certificates.
You can view the WebJobs running on an Azure website via Kudu, in fact you'll see a link in the title bar of the images above when I was configuring the site extension. Drilling down into those WebJobs, I can see a brand new one from Let's Encrypt:
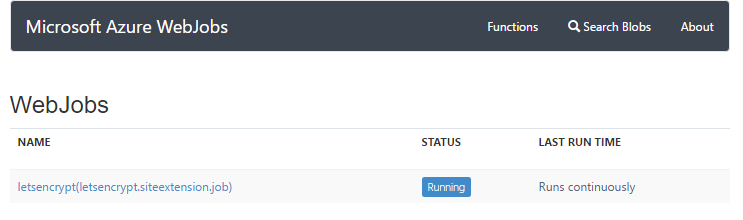
You can drill down into that job and see a couple of functions running:
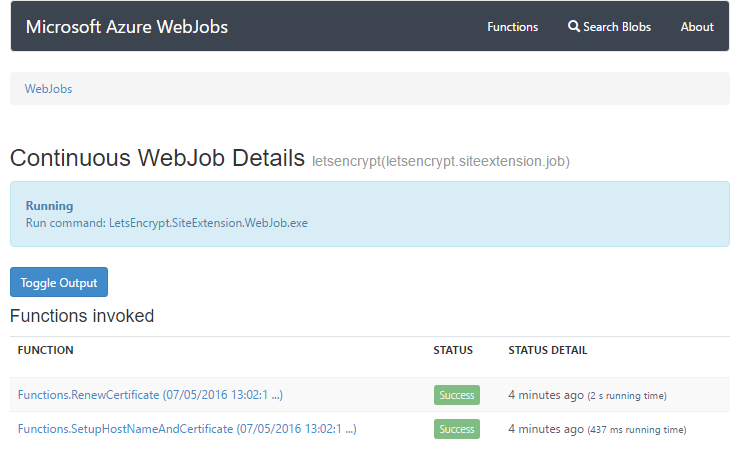
The names of those give you a good idea of what they're intended to do and inevitably, a few months from now, I'll see output in the jobs suggesting that a new certificate has been installed and created. I hope. If all goes to plan, which kinda brings me to the next point...
Proceed with caution...
Here's the first problem I have with all this - time. Time to figure out the Let's Encrypt paradigm within Azure, time to configure it all, time to make sure what you might uncharitably call "a kludge of different components" all work nice together. I've had people say to me many times that Let's Encrypt makes SSL "free" but that's just not the case and it totally neglects the total cost of ownership of making this thing work. I originally saw my mate Nik Molnar's post on this earlier in the year and thought "holy shit, that's a lot of work". And relatively speaking, it was. From a pure ROI perspective, spending 70 bucks on a certificate bought via the Azure portal almost certainly makes more sense, at least for the first year until the manual renewal process of a traditional cert is required.
The second problem I have with this is that there's a lot of moving parts keeping this whole thing alive. The service principal needs to exist and have rights within the website which must be configured to access the storage account which will be written to via the WebJob which must have access to the correct connecting strings and app settings in the website. I have the ability to screw any of these things up myself well after I've already configured them and indeed it's the sort of thing I can see someone inadvertently doing ("Why do I have a storage account for that site? I'm sure I don't need it, let me get rid of that..."). Microsoft themselves recently had a glitch which deleted all my app settings from HIBP (it was publicly acknowledged and affected a small number of customers), so you can see my concern. If any of this fails, the cert won't be renewed and disaster will ensue when people realise they can't access the website. Conversely, there's a lot of manual mucking around every time you renew a traditional cert anyway, although you only have to get that right once a year as opposed to all the processes described here needing to work in perfect harmony 4 times a year.
To be completely fair to Let's Encrypt, this is a much easier process when you have root on a Linux box. That's the level of ease I'd love to see in Azure but we're comparing total control of an environment to managing a PaaS offering here. The joy of PaaS though is that there's the potential to abstract all the hard work away and offer it as a service so certainly that could be on the road map for Azure.
You know what I'd really like? I'd like this:
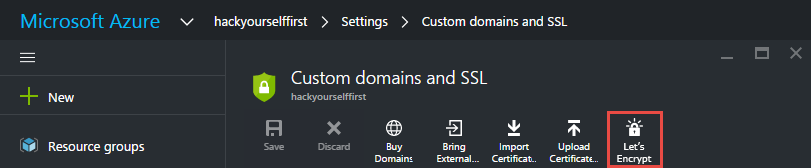
I'd love Microsoft to get on board with Let's Encrypt and make it a first class citizen within the Azure portal (and I'll definitely be raising that with them too). Make it properly automated within the portal and run the cert renewal as a process behind the user-configurable scenes. As an end-user, I'd love to simply say "give me a cert" and it's a single button click then job done.
At this stage, I'd still seriously consider following the CloudFlare approach I wrote about last year. It's significantly easier to setup, it's a well-proven model and it's also still free and includes automatic renewals. Plus, it does a heap of other security and perf things too and yes, some people will bemoan that it may not always encrypt all the way through to the origin (that's an issue I'll take up in another blog post) but it sure is a hell of a lot easier and less likely to go wrong.
Until we see the Let's Encrypt process described above fully automated and really owned by Microsoft, I'd be cautious about using it on an important site. Having said that, I'd still encourage anyone comfortable with all of this to back Let's Encrypt and give them the support they need to keep on growing. Let's remember this is early days - we're literally only 8 months into the service - so they've done remarkable things already in such a short time and they will be a significant part of the SSL landscape in the future. Ultimately though, whether it's Let's Encrypt or Comodo or CloudFlare, the march forward from no transport layer security whatsoever is a very positive shift for the web indeed.
Edit, 27 April 2017: I've just read Ohad Schneider's comment below which points to an open issue on GitHub regarding this site extension. It seems that publishing the website with "Delete Existing Files" checked (which I've certainly done many times before to keep the target site clean), inadvertently kills the WebJob that renews the cert. It's quite possible that the first you'd know about this is when your cert expired and site broke. As I say above, be very careful about using Let's Encrypt in this way, I wouldn't risk it on anything important.