In part 1, I deliberately kept everything really high level because frankly, I didn't want to scare people off. I'm not ashamed to say that the process of getting even the basics working absolutely did my head in as I waded through a sea of unfamiliar technologies, protocols and acronyms. I wish I'd had just the fundamentals down pat before going deeper and that was my intention with the first part of the series.
So, peeling back that next layer, the whole IoT space isn't just about devices that get their own IP address on your network and talk over TCP (or UDP). Many of them do (such as the Shelly switch in part 1), but then there's the whole Zigbee space as well. Let's drill into all that and then go deeper into custom firmware and soldering too.
IoT and IP Addresses
So, what happens when you start filling your home with IoT things? You end up assigning a lot of IP addresses; here's what it looks like in Ubiquiti's UniFi dashboard:
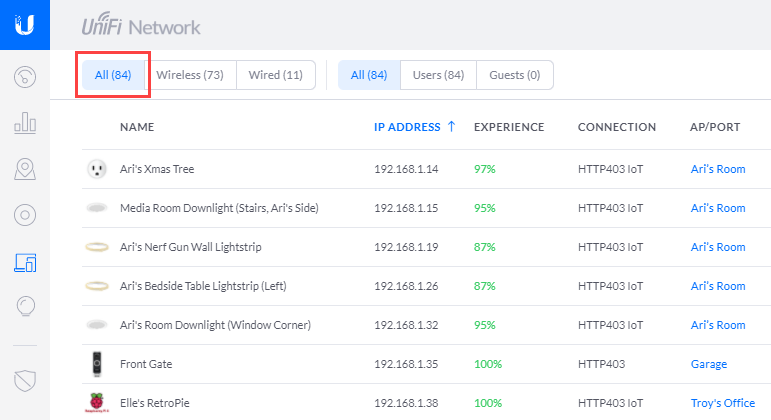
Clearly, I have a long way to go before exhausting available IPV4 addresses on this subnet so that's not something that worries me right now. Plus, all my IoT devices are on their own Wi-Fi network and it'd be dead simple just to start assigning those devices IPs from a different subnet (more on that in part 3 about security). IPV6? It's rare to see in IoT devices today, but there are many compelling reasons that make a lot of sense to see broader support in the future.
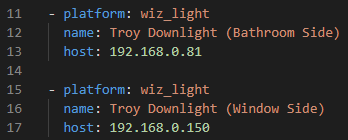
For the most part, the IoT devices in my home simply take their IP address from the DHCP server and I never think about it again. There are, however, occasions where you end up getting tied to specific IP addresses. For example, here's how the downlights in my office are configured in HA courtesy of the Wiz integration:
Then, one day, the lights stopped working. Why? They worked fine in the native Wiz app, why were they dead in HA? Back into the UniFi dashboard, down to the Wiz lights and... ah:

Because they're dynamically assigned an IP address, at some stage the lights had restarted and got themselves new ones. The fix, however, was easy:

I got to thinking more about IP address reservation (which is what you see above where the same IP is always assigned by the DHCP server) versus static IP address (where the IP is set in the client itself), after having to totally rebuild my network. (If you're interested in what happened, I covered it in detail in weekly update video 216.) There's a good overview of the two approaches here but in a nutshell, central management is always preferable. It means it's very easy to jump into the UniFi dashboard and get a quick list of all the fixed IP addresses in the network (it's under "Insights"):
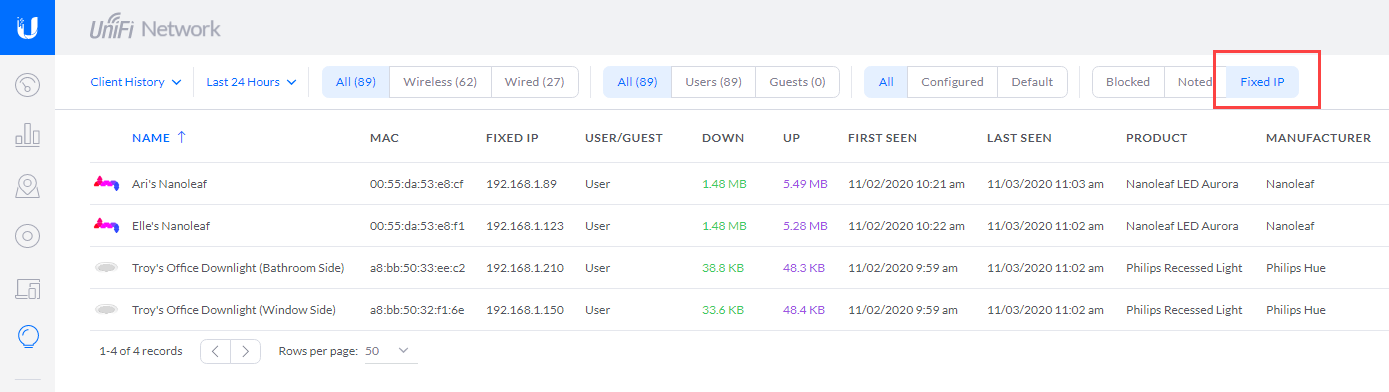
The kids' Nanoleaves also use reserved IPs because like the Wiz lights, the HA integration needs a hard-coded IP address for the device. Having easy access to configurability such as this at the network layer is really essential, so let's delve into that network layer and talk about good gear.
Good Network Gear is Essential
As you're probably starting to gather from this series (and you'll see more of this as it progresses), you find yourself spending a lot of time troubleshooting problems. Why can't I see a device? Why can only some clients see a device? Why is the device slow to respond? Why have I started drinking so much since beginning my IoT journey? Having good visibility into my network configuration has been absolutely essential in helping answer those questions.
I've been a vocal proponent of Ubiquiti's gear for many years now and it's an absolutely essential part of my IoT world. (Disclosure: I bought every piece of equipment in that original blog post. Since then, they've sent me a bunch of gear.) For example, when I look at my network topology today, I can easily see everything that's connected to everything else:
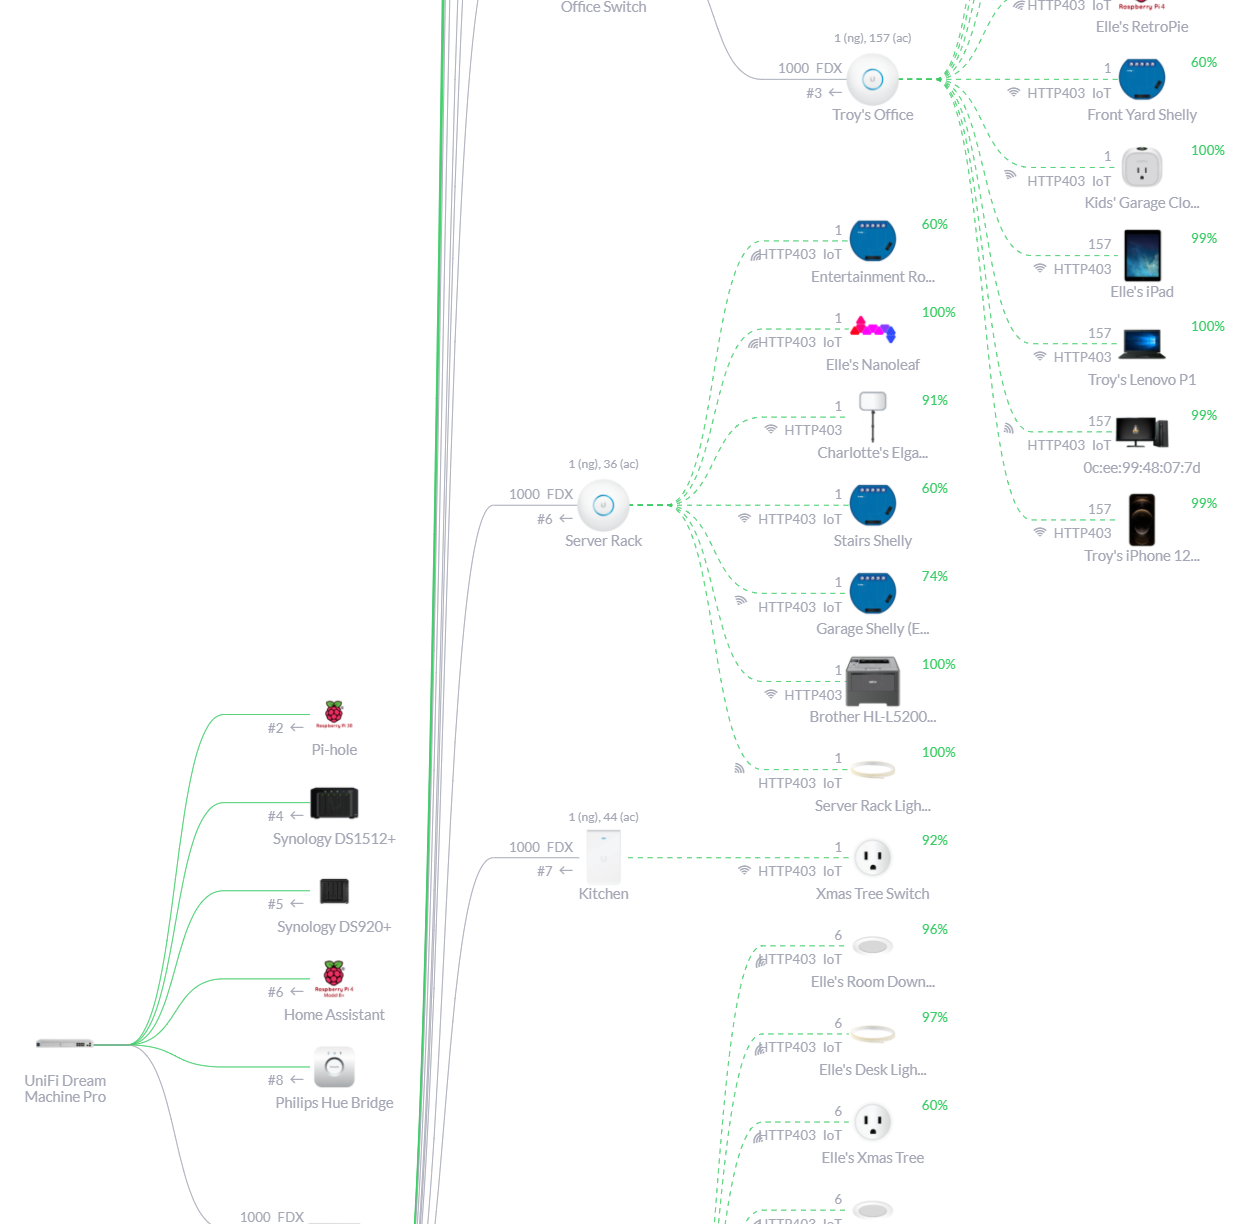
I've named each and every device I've added to the network and given it a descriptive icon so that at a glance, I can get a really good idea of how everything is tied together. I can easily block a device from talking to the internet, throttle its connection, see which online services it's communicating with and access a whole host of other information about it. For example, just today I was trying to identify one pesky device I hadn't named earlier on and now had no idea what it was:
Trying to figure out what a client I'd previously connected to my network is. I put it on my IoT network, it's connected to my Office AP and it's running Linux and downloading data from Amazon and Spotify, ideas? pic.twitter.com/PE3eVLseFY
— Troy Hunt (@troyhunt) November 24, 2020
Turns out it was my daughter Elle's Amazon Echo Dot.
The Wi-Fi network is the foundation on which the IoT network is built. Investing in that was the best thing I could have done in advance of joining all the things to my network. But not all IoT is IP-based, far from it. Let's jump into Zigbee.
Zigbee
Alrighty, first things first: It's Zigbee, not ZigBee. I'm a stickler for details like this and it was driving me nuts seeing both stylisations all over the place but as of 2017, the "b" is lowercase (because I'm a stickler I kept scrolling back through zigbee.com on archive.org until I worked out when it changed). The Zigbee standard is maintained by the Zigbee Alliance, a group of companies responsible for shepherding it in the right direction. Zigbee uses the IEEE 802.15.4 standard and it's worthwhile understanding why, especially as compared to having devices just communicating directly over Wi-Fi:
IEEE standard 802.15.4 intends to offer the fundamental lower network layers of a type of wireless personal area network (WPAN) which focuses on low-cost, low-speed ubiquitous communication between devices. It can be contrasted with other approaches, such as Wi-Fi, which offer more bandwidth and require more power. The emphasis is on very low cost communication of nearby devices with little to no underlying infrastructure, intending to exploit this to lower power consumption even more.IEEE 802.15. 4 is a low-data rate wireless personal area network and is the PHY and MAC layer used by many IoT protocols, such as ZigBee, and WirelessHART.
In other words, the value proposition is low power consumption and low cost at the expense of bandwidth. But that's just fine for devices like this:
Just had a Mi temp and humidity sensor arrive for the IoT stuff I’m doing. Really neat size, it’d be easy to place a bunch of these around the house, yet to see it actually work though... pic.twitter.com/yjgtR87DUo
— Troy Hunt (@troyhunt) June 7, 2020
In fact, it's perfect for devices like this because they can be battery powered (they run on a standard CR2032) and get a couple of years of life and they only need to transmit a few simple values at a relatively low frequency.
Let me divert on a quick tangent for a moment: Zigbee isn't the only low-power, low-bandwidth standard out there and as I went through my travels, many people also suggested various Z-wave devices. I went all in on Zigbee primarily because the Aqara devices are great (more on them soon) and I already had Philips Hue units I could use as range extenders (more on that soon too). I may well end up with Z-wave devices in the future as well and I'd be remiss not to mention them here, but at present I haven't needed to diversify beyond Zigbee.
But Zigbee ain't Wi-Fi so you can't just buy a little device like the one above and connect it to an existing network, it needs a hub that can talk 802.15.4 to do that and suddenly, we're back into proprietary land again. For example, both the little temp sensor above and the motion sensors I discussed in part 1 are made by Xiaomi and I could always buy the Aqara Hub and connect them up:
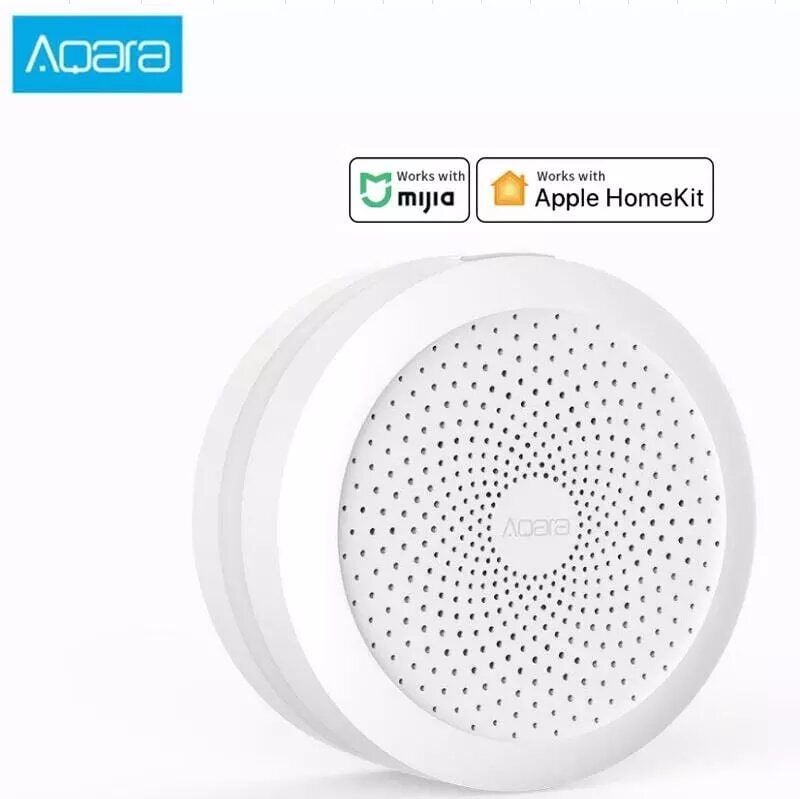
But then what about other Zigbee devices from other manufacturers? For example, I've got a bunch of Philips Hue lights in the house and they run over Zigbee, do I really want to end up with a Philips Hue hub (which I actually already had and has an HA integration) plus an Aqara hub (which also has an HA integration) plus whatever other devices I end up with and their own hubs as well? Not really, which brings me to the ConBee II Zigbee sniffer.
ConBee II, The Universal Zigbee USB Gateway
HA alone can't read from Zigbee devices and as already discussed, they also can't drop directly onto your Wi-Fi hence the need for a hub. What folks tend to do is go for a "CC2531 stick" which can "sniff" Zigbee traffic. CC2531 is a chipset made by Texas Instruments (check the date on that resources, this goes back over a decade) that appears in a whole heap of cheap units sold as "Zigbee sniffers". But there was one particular model that came up time and time again after I posted that earlier tweet with the temp sensor; without prompting, many people directed me to the ConBee II, a little USB stick with a CC2531 chip that can talk IEEE 802.15.4 and implements the Zigbee protocol. See how that ties all these new things together? 😊
Here's the unit:
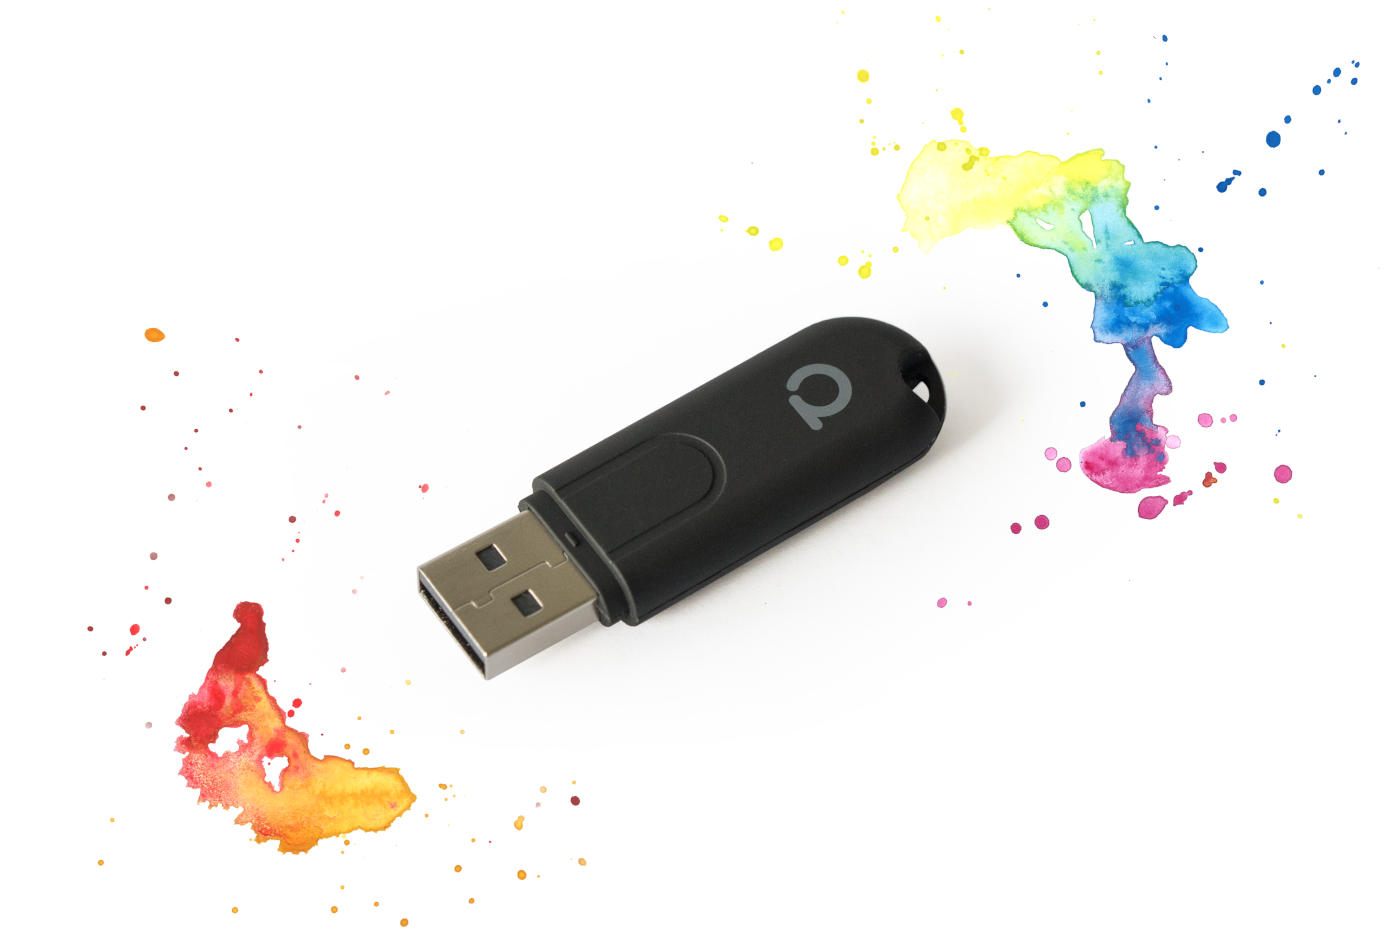
The ConBee II is produced under the Phoscon brand, a name I mentioned back in part 1 in relation to the deCONZ integration. I picked one up off Amazon for A$78, plugged it into the USB port of the Raspberry Pi running HA then configured it all by following this great guide which takes you through the entire journey. When I went through that process only 6 months after that post was written, there were quite a few bits that were out of date (namely where things are located within the UI), but it was still easy to follow. Once done, all the mechanics are now there to join up all the respective bits of the Zigbee network:

The next problem is that in my case, I ended up with a single USB sniffer stuck into a Raspberry Pi inside a server rack inside a large walk-in cupboard inside a garage at the bottom of a large 3-story solid brick construction house. You can guess what comes next...
Extending Zigbee Range with Repeaters
In fairness to the ConBee II, it did an admirable job under the circumstances and indeed its range is a big selling point:
Thanks to its power-amplifier, the ConBee II has an outstanding range. This lets the signal pass through 2–3 rooms or floors, depending on the construction type.
But it wasn't enough. I continually found temp sensors (which I now had in every single room) not being available so clearly something had to give. Fortunately, one of the joys of Zigbee is that - and I'm going to quote here - "all mains powered Zigbee devices, such as lights and sockets, act as repeaters and can route the signal". This is again from the Phoscon page on the ConBee II which they illustrate as follows:
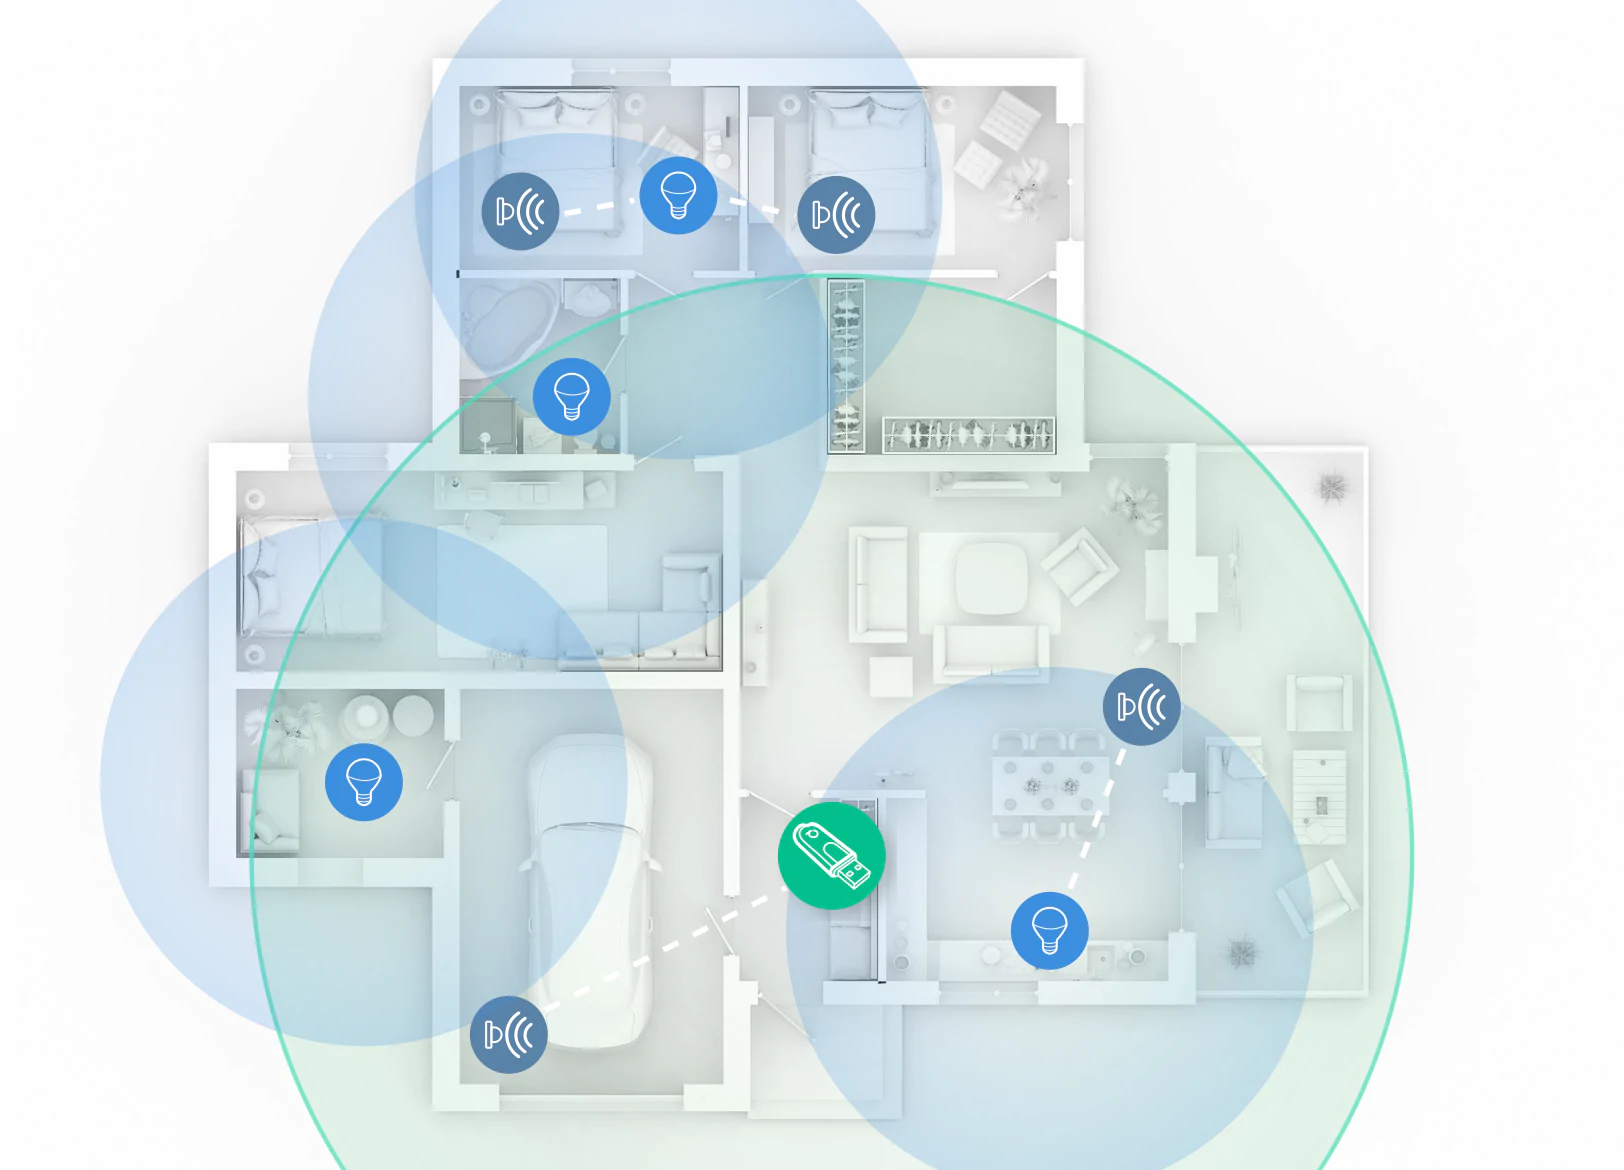
This creates a mesh network enabling you to expand the Zigbee range as more (mains powered) devices are added. That's all good in theory but in practice, well, let me just drop a discussion I had with my good mate Scott Helme in right here as he was going through his own HA build:
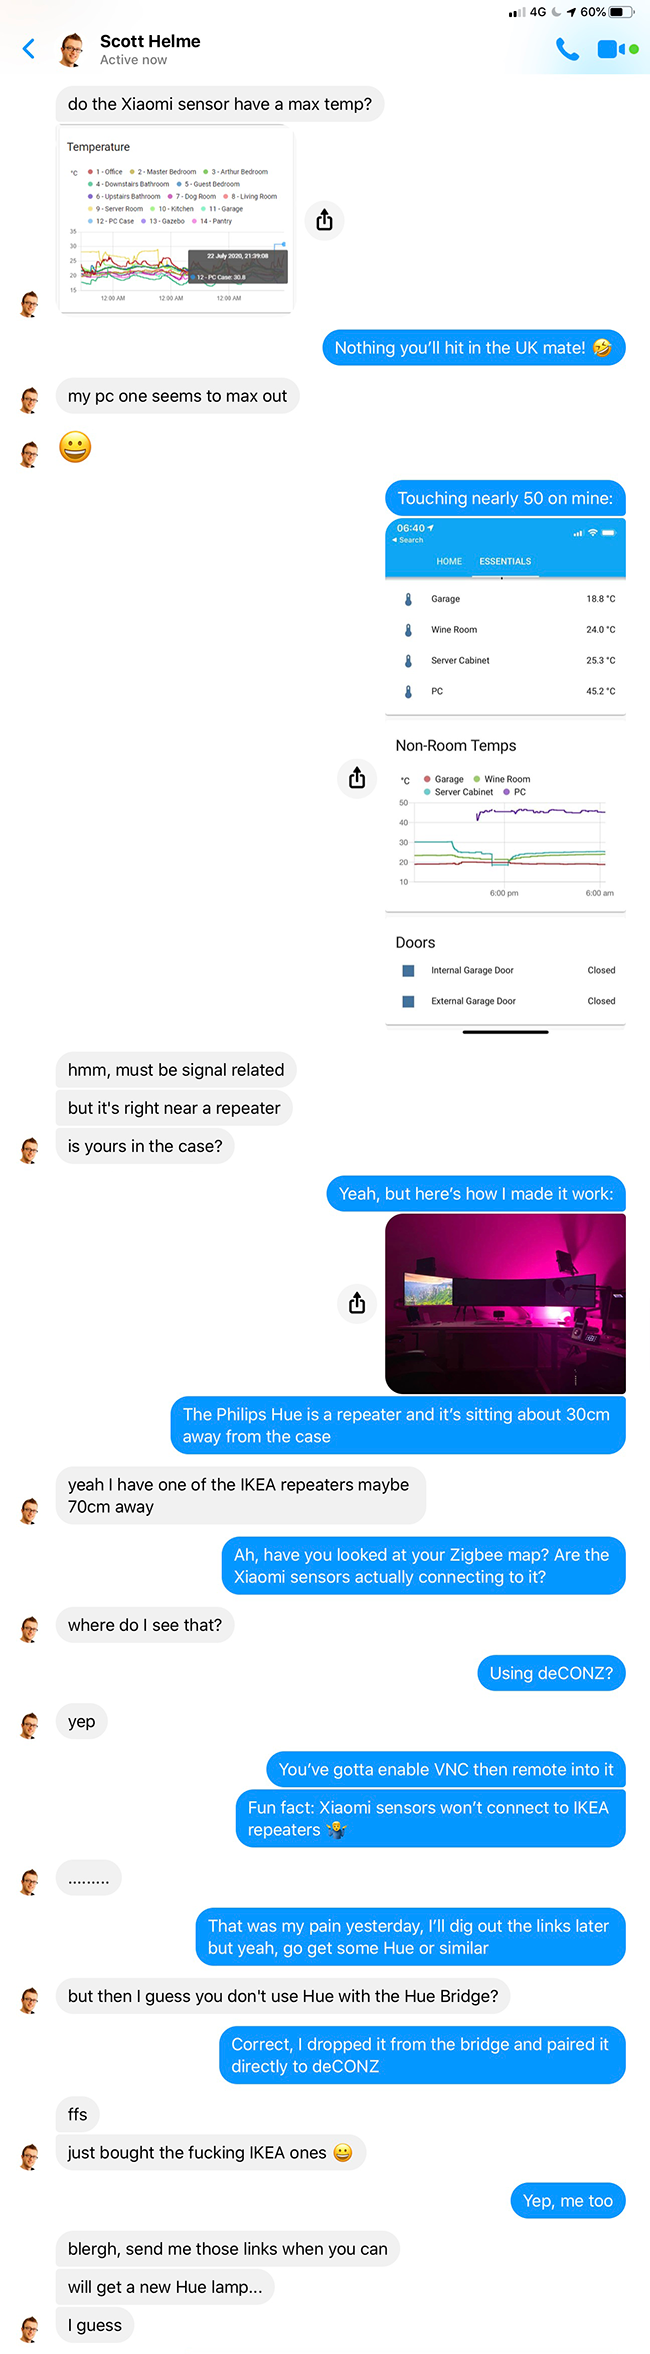
I wanted to include this discussion in its original candid state because it perfectly illustrates the frustrations I raised in part 1: this is still a "maker" world where even people who live and breathe tech day in and day out continue to hit hurdles. I found multiple references around the web about the IKEA repeaters not playing nice with Xiaomi devices, yet when I looked at my own Zigbee network, I saw this:
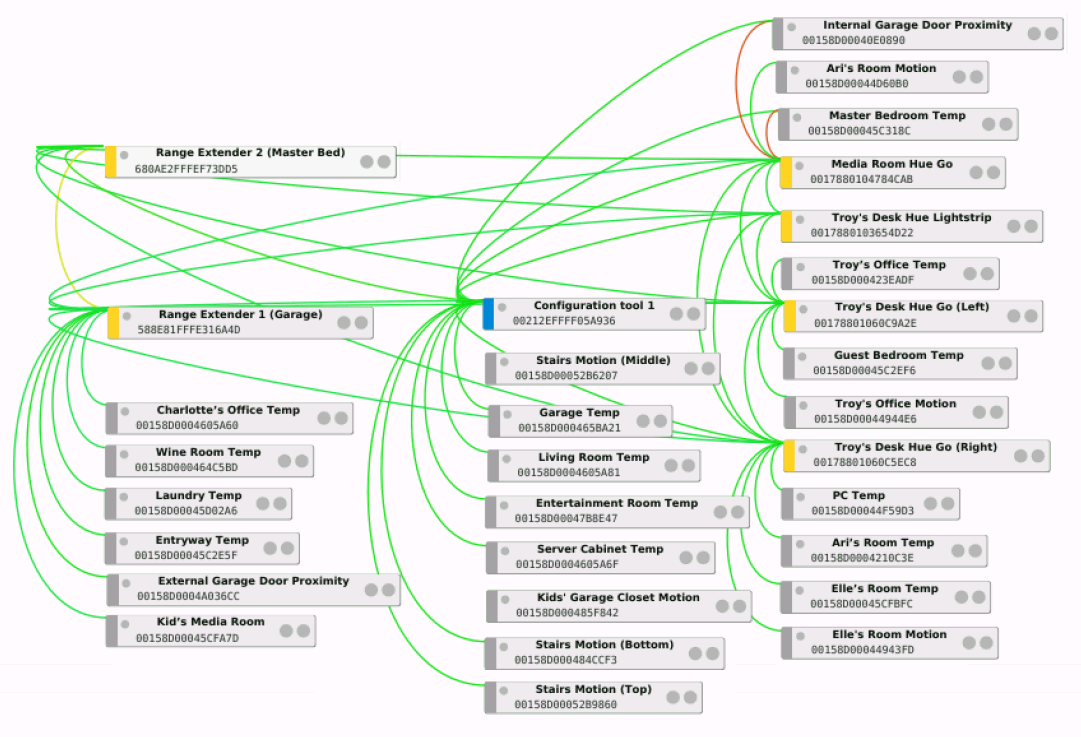
I can see plenty of devices connected to "Range Extender 1" in the garage! But no devices connected to "Range Extender 2" in the master bedroom. There are too many devices spread out over too large an area for this to be a mere coincidence, is it simply that one range extender doesn't want to connect and one does? I've ordered another couple just to see what happens, but I continually get the feeling that this whole effort raises more questions than it answers...
A quick sidenote on those Philips Hue devices in the Zigbee map above: per my discussion with Scott, I had to unpair them from the Hue Bridge and then pair them in deCONZ just like all the other Zigbee devices. Consequently, I can no longer use the Philips Hue app to manage, say, the two Hue Go units on my desk. As I said in part 1, the native apps are often richer in functionality than what HA provides and that's the case here too. I have several Hue light strips around my fireplace, one behind my TV and one behind the perimeter of a massive mirror in my entertainment room. I want the family to be able to manage these directly via an easy to use app hence I haven't moved them over to deCONZ. That means they don't form part of the Zigbee mesh network in the image above, but they're also in locations where there's plenty of coverage already. My office really needed more coverage (it's several floors above where the ConBee II is located) and it's only me who manages them hence their presence on the deCONZ network.
One final thing on the whole Zigbee piece: I'm seeing a lot of feedback about people having problems with deCONZ and switching over to ZHA instead:
Hi Troy just read your post.
— Dementor 🇮🇱 (@the_mentor) November 23, 2020
Really cool stuff.
You should know that you can switch from deCONZ to native ZHA integration imo it works much better and makes the integration much better.
I did the switch a few months ago and it's been great only downside is you need to pair again.
The Zigbee Home Automation ("ZHA") integration seems to be quite highly regarded and if I'm honest, I've had a lot of problems with deCONZ. When I look at it within HA now, there's a bunch of devices that have lost the carefully crafted names I provided them with when originally pairing them:
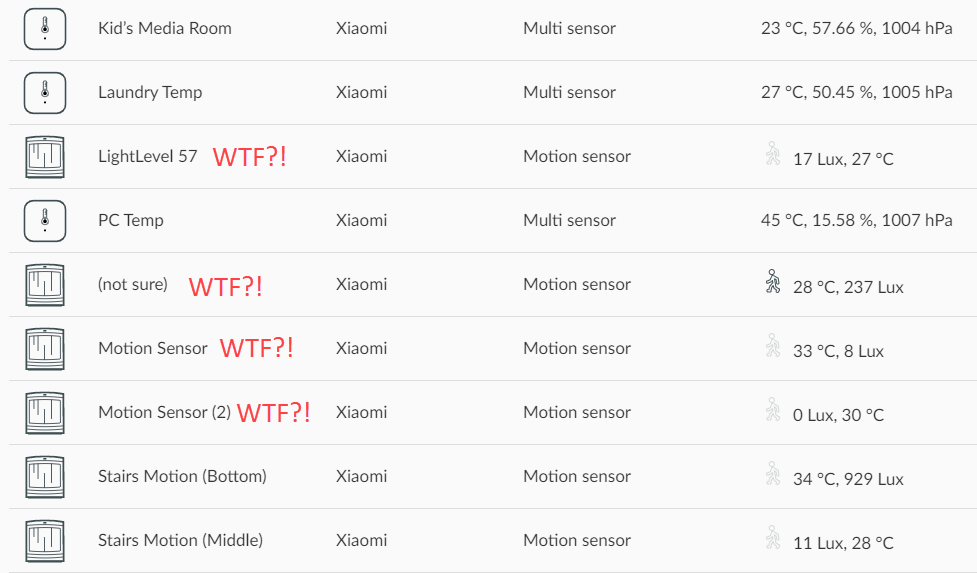
This happens over and over again and to be honest, I just need to bite the bullet, kill deCONZ, set up ZHA and manually re-pair every single Zigbee device in the house 😭 To be clear, this isn't breaking the HA references to the devices in any way, it just screws up their representation within deCONZ and subsequently, the earlier network map as well.
But for the most part the Zigbee stuff has been great, especially those Xiaomi Aqara devices. Let's drill into them now.
Xiaomi Aqara
I want to devote a section of this post specifically to Xiaomi Aqara as these are great little devices that I now have all over the house. Before I get to the devices themselves, a bit of disambiguation around the names you'll see used here:
- Xiaomi is the Chinese company that makes the gear
- Mi is an abbreviation of their name (their website is literally just mi.com)
- Mijia is a brand name owned by Xiaomi (you would have seen it on the Aqara hub image earlier on)
- Aqara is a brand name owned by Xiaomi
Bottom line: Aqara is the name you'll see me using here as that's what's on the devices I've been buying (plus I can spell it more reliably than Xiaomi!) They're cheap, reliable and in my view, pretty slick looking little units. Earlier in this post I showed one of the temp sensors (pro tip: the round ones are an earlier generation, the square ones are newer and also do air pressure as well as temp and humidity), and in part 1 I showed the motion sensors which trigger lights when it's dark. Beyond those, I've used a number of proximity sensors so I know when doors are open or shut:
— Troy Hunt (@troyhunt) July 7, 2020
In part 1 when I showed my Apple Watch opening the garage door, this is achieved by defining a cover in HA. A cover, uh, "covers" stuff so blinds, shutters and garage doors, for example. When you think about a cover like a garage door, there's really 2 things you want visibility or control over:
- Is it open or shut
- Open or shut it
The proximity sensor answers the first point and the Shelly from part 1 answers the second point. Combined, they enable me to glance at my watch, see the state of the garage door and then change that state.
I also picked up a few Aqara buttons to do, well, anything:
IoT button. What does it do? Absolutely anything I want 🙂 pic.twitter.com/wXxsdPsXFo
— Troy Hunt (@troyhunt) October 27, 2020
These are simple triggers that can be used in automations. For example, I have one at the bottom of my stairs that can turn off a bunch of lights with just a single click. Those lights normally come on just before sunset but if I want to manually turn them on, that's just a double-click on the same button. Neat!
And inspired by others, I even attached a vibration sensor to my letterbox:
Get mailbox notifications in 4 easy steps: 1) Get a @AQaraSmarthouse vibration/movement sensor 2) add it to your local #ZigBee network 3) attach it to the mailbox 4) add some automation to @home_assistant so you get a notification every time there's movement! #homeautomation pic.twitter.com/tP9pg7lzu1
— Pedro Lamas (@pedrolamas) July 7, 2019
There are plenty of Zigbee devices out there, but I wanted to call out Aqara in particular as they've just been so damn reliable. Only once have I had an issue with any of the couple of dozen devices I have in the house, and that was just the letterbox vibration sensor shipping with a near-flat battery.
I put a temp sensor in each room right at the beginning of my HA journey. It was simple, cheap and immediately gave me useful data I could start doing stuff with:
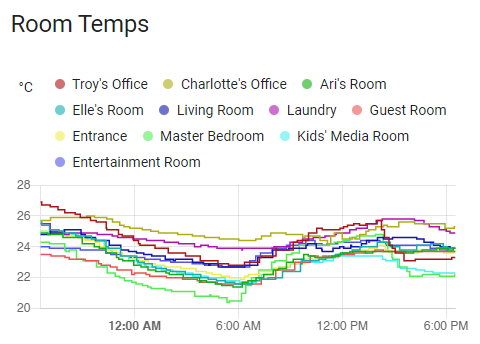
So pro tip: if you want to get into HA and IoT in a meaningful way, start here and work up. Those temp sensors are cheap, useful and give you a means of dipping your toe into the IoT water in a pretty low-friction way. Chuck in some motion and proximity sensors and there's a bunch of stuff you can do right away without spending much.
Let's now move onto something completely the opposite of low-friction and get our hands much, much dirtier.
Flashing Custom Firmware and Soldering
I propose that we all need to find our own paths in terms of just how dirty we want to get our hands when playing with IoT. For many, the whole idea of running a Raspberry Pi with community driven software you configure with YAML is a step too far. For others, it's just the beginning with many people going down the path of, per the heading above, flashing custom firmware onto devices and soldering wires. In fact, this is the path I was originally going to head down for my garage door by following this video:
I bought all the bits, downloaded the firmware flasher, wired it all up per the instructions yet still, found myself lost:
Need some debug help with Sonoff SV and Tasmotizer: boards seem to be wired up properly, serial converter LED comes on, Sonoff is powered on with reflash button held, COM port is correct yet Tasmotizer can't see the Sonoff. Anything obvious wrong? pic.twitter.com/DByJqCEKDQ
— Troy Hunt (@troyhunt) August 24, 2020
I then discovered that contrary to the instructions, RX shouldn't go to TX, it should go to RX and right there at that moment, I'll be honest: I lost my shit. Why is this so hard?! Why do I need to modify the firmware of such a simple little device?! And why do I then find myself holding a burning soldering iron just to open my freakin' garage door?!
To be fair to the folks that enjoy living in this world, I can see the attraction and I have great respect for those with the skill and patience to take this path. Tasmota is enormously popular open source firmware designed for ESP8266 devices which is the chipset many IoT products run (including a bunch of the lights in my house). But for me, it's a step too far and an unnecessary one at that given how easy it eventually was to achieve the same result with a Shelly that requires no custom firmware, no soldering and has no exposed circuitry:
Slick 😎 pic.twitter.com/QT0hM9XPYp
— Troy Hunt (@troyhunt) August 26, 2020
The most complex part of this entire approach was reading the garage door opener manual and referring to the terminal block on the back of the unit:

And per the manual:
O/S/C INPUT is used for the connection of a wired switch (momentary contact). This switch can then be used to open, stop or close the door.
All the garage door automation needed to do was close the circuit between the COM and OSC terminals via the Shelly which is then powered via the 24V terminal. The point I'm trying to make is that there's a heap that can be done without going down to the custom firmware and soldering layers and I wish I'd known that before I got started. This, to my mind, is the "happy path" I referred to in part 1.
Summary
This post mostly boils down to "have a decent network, get Aqara Zigbee devices and avoid custom firmware and soldering unless you really want to go in that direction". It feels obvious now to summarise it so succinctly, but it took a lot of trial and error to reach those conclusions. Tomorrow in part 3, it's time to talk about security and oh boy, there's a can of worms right there!
Lastly, and as I mentioned in the conclusion to part 1, Scott and I will be doing a live stream on Friday where we discuss how we've both approached the whole IoT piece. It'll be candid, direct and we'll definitely be taking questions too so come join in then via the video below 👇
Series Links
- Part 1: It's a Mess... But Then There's Home Assistant
- Part 2: IP Addresses, Network, Zigbee, Custom Firmware and Soldering
- Part 3: Security
- Part 4: Making it All Work for Humans
- Part 5: Practical Use Case Videos